Key Features of FPT AI eKYC Portal
1. Domain
| Environment | Portal URL |
|---|---|
| Stagging | web-ekyc-uat.fpt.ai |
| Production | ekyc.fpt.ai |
2. Account Login
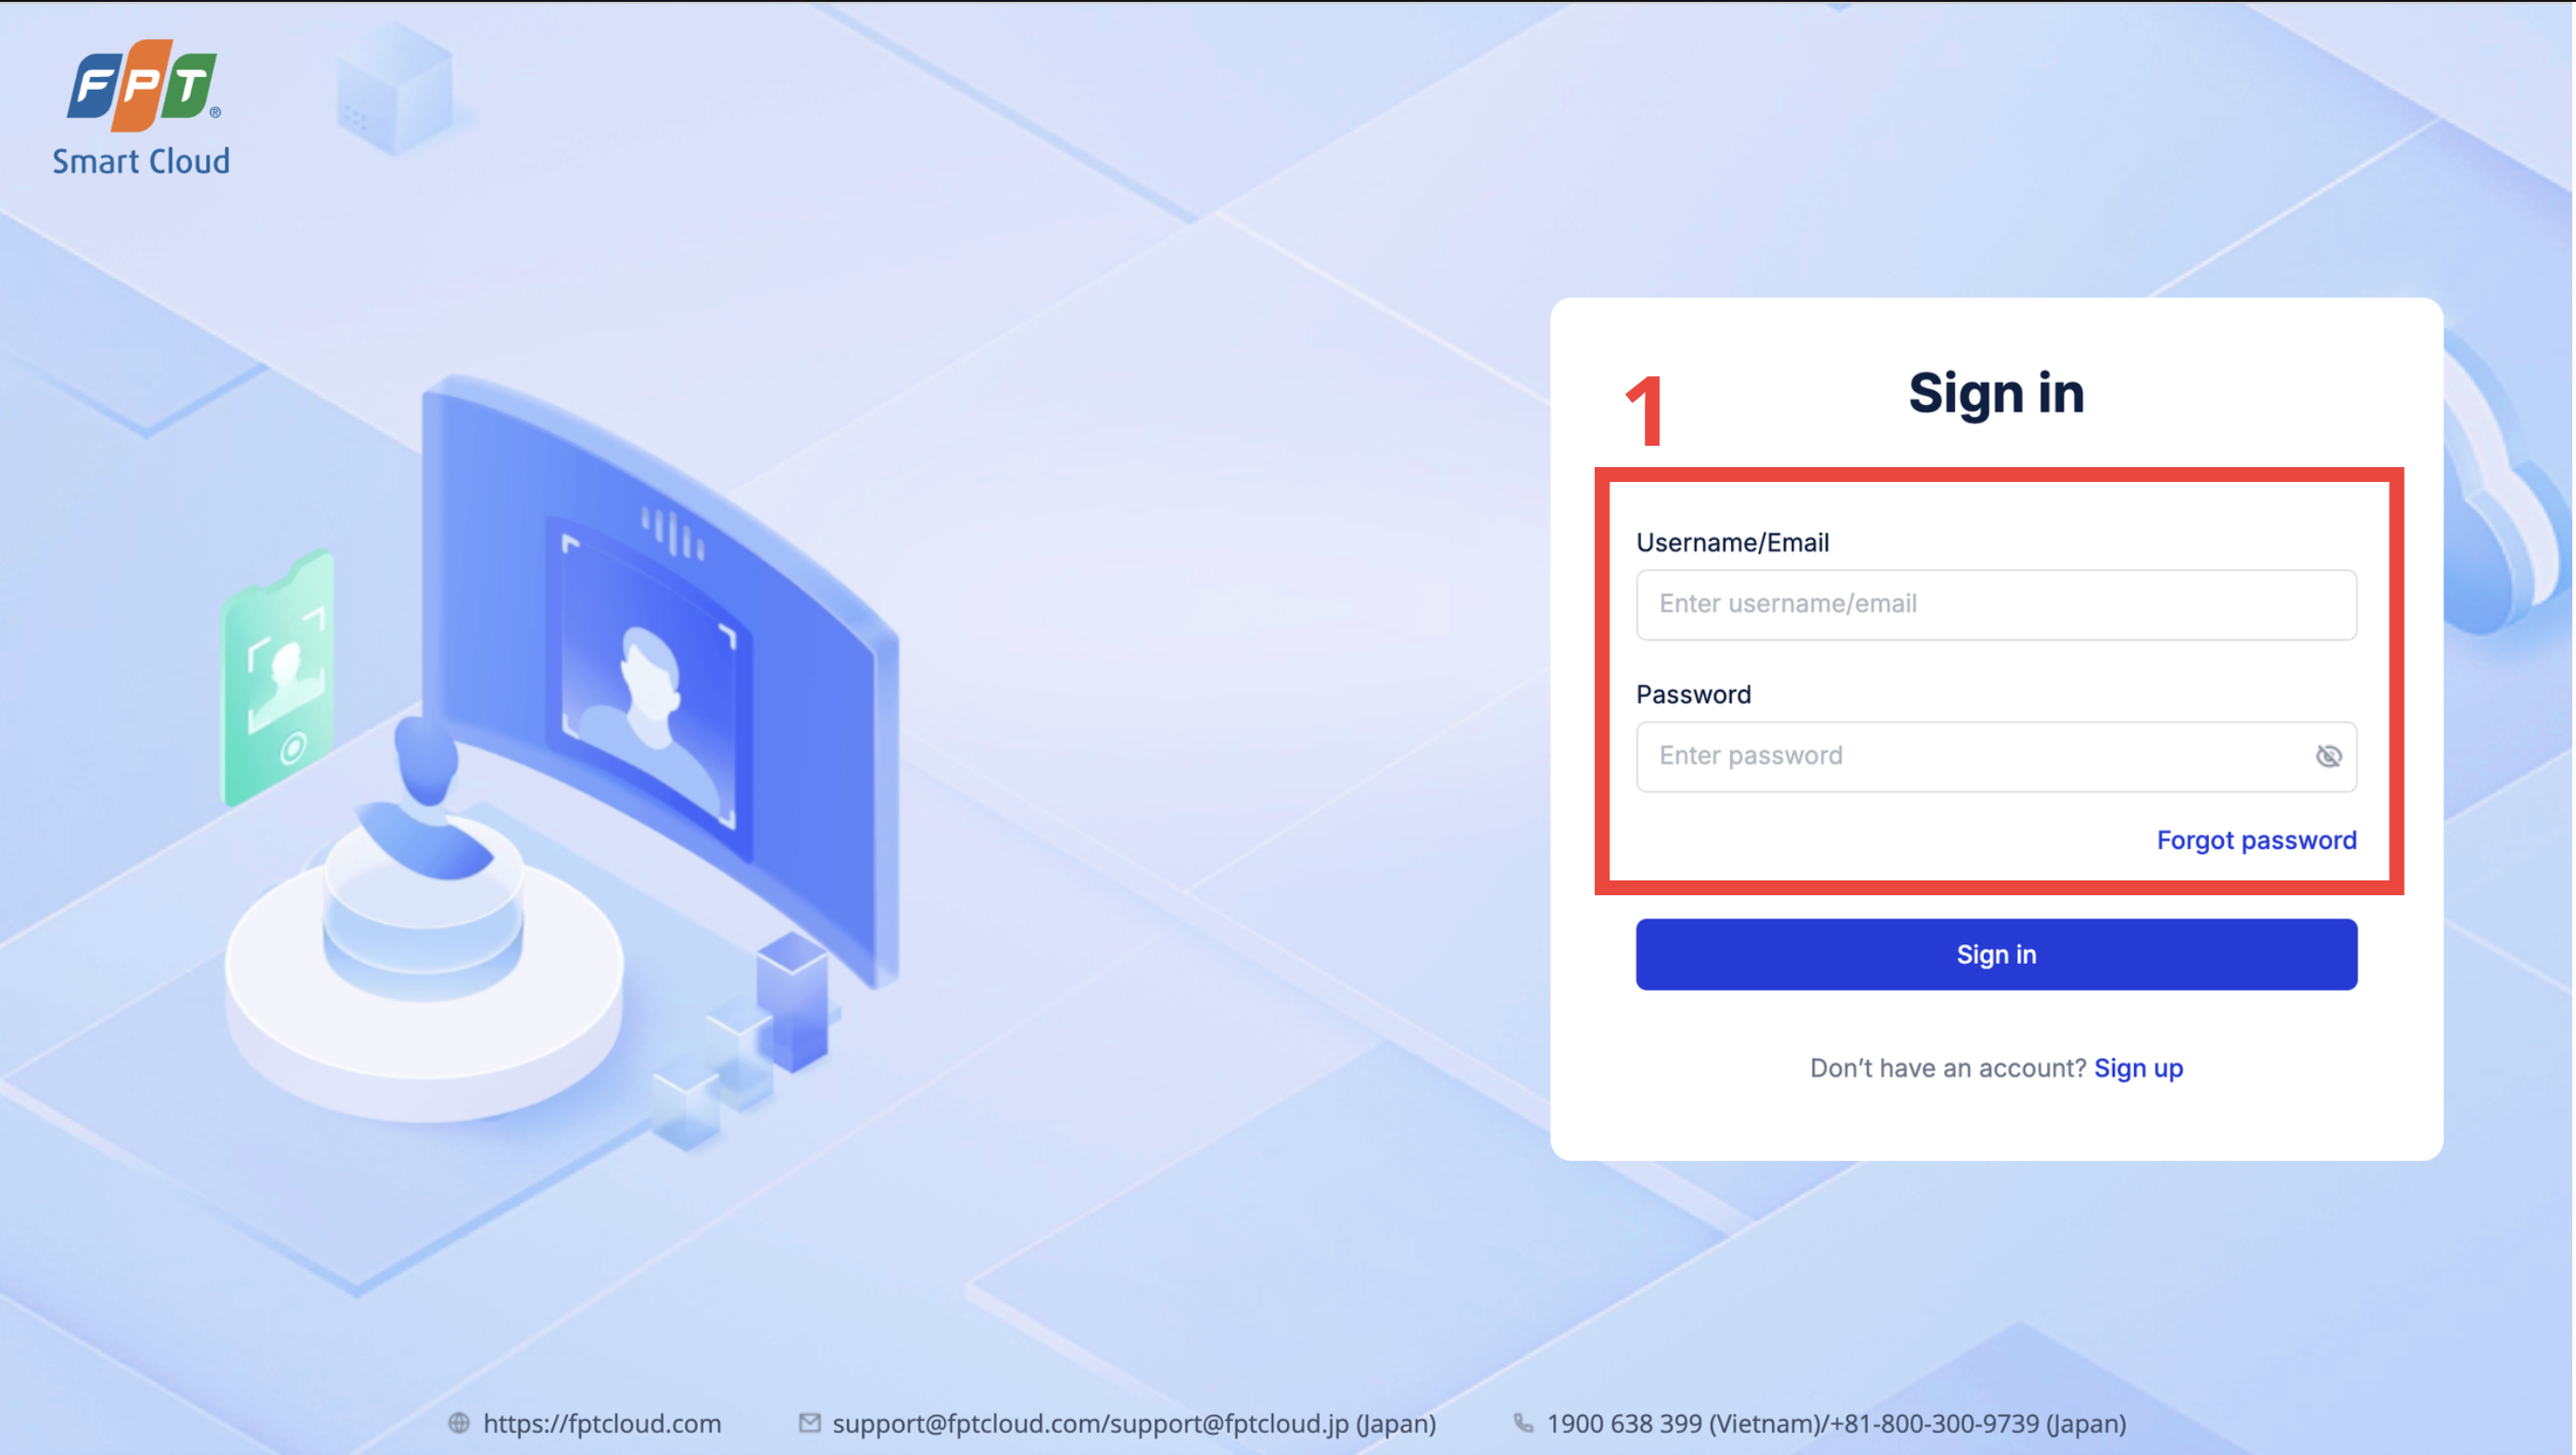
Step 1: Log in with the account provided by FPT.AI. If you do not have account information, contact FPT.AI to obtain login credentials.
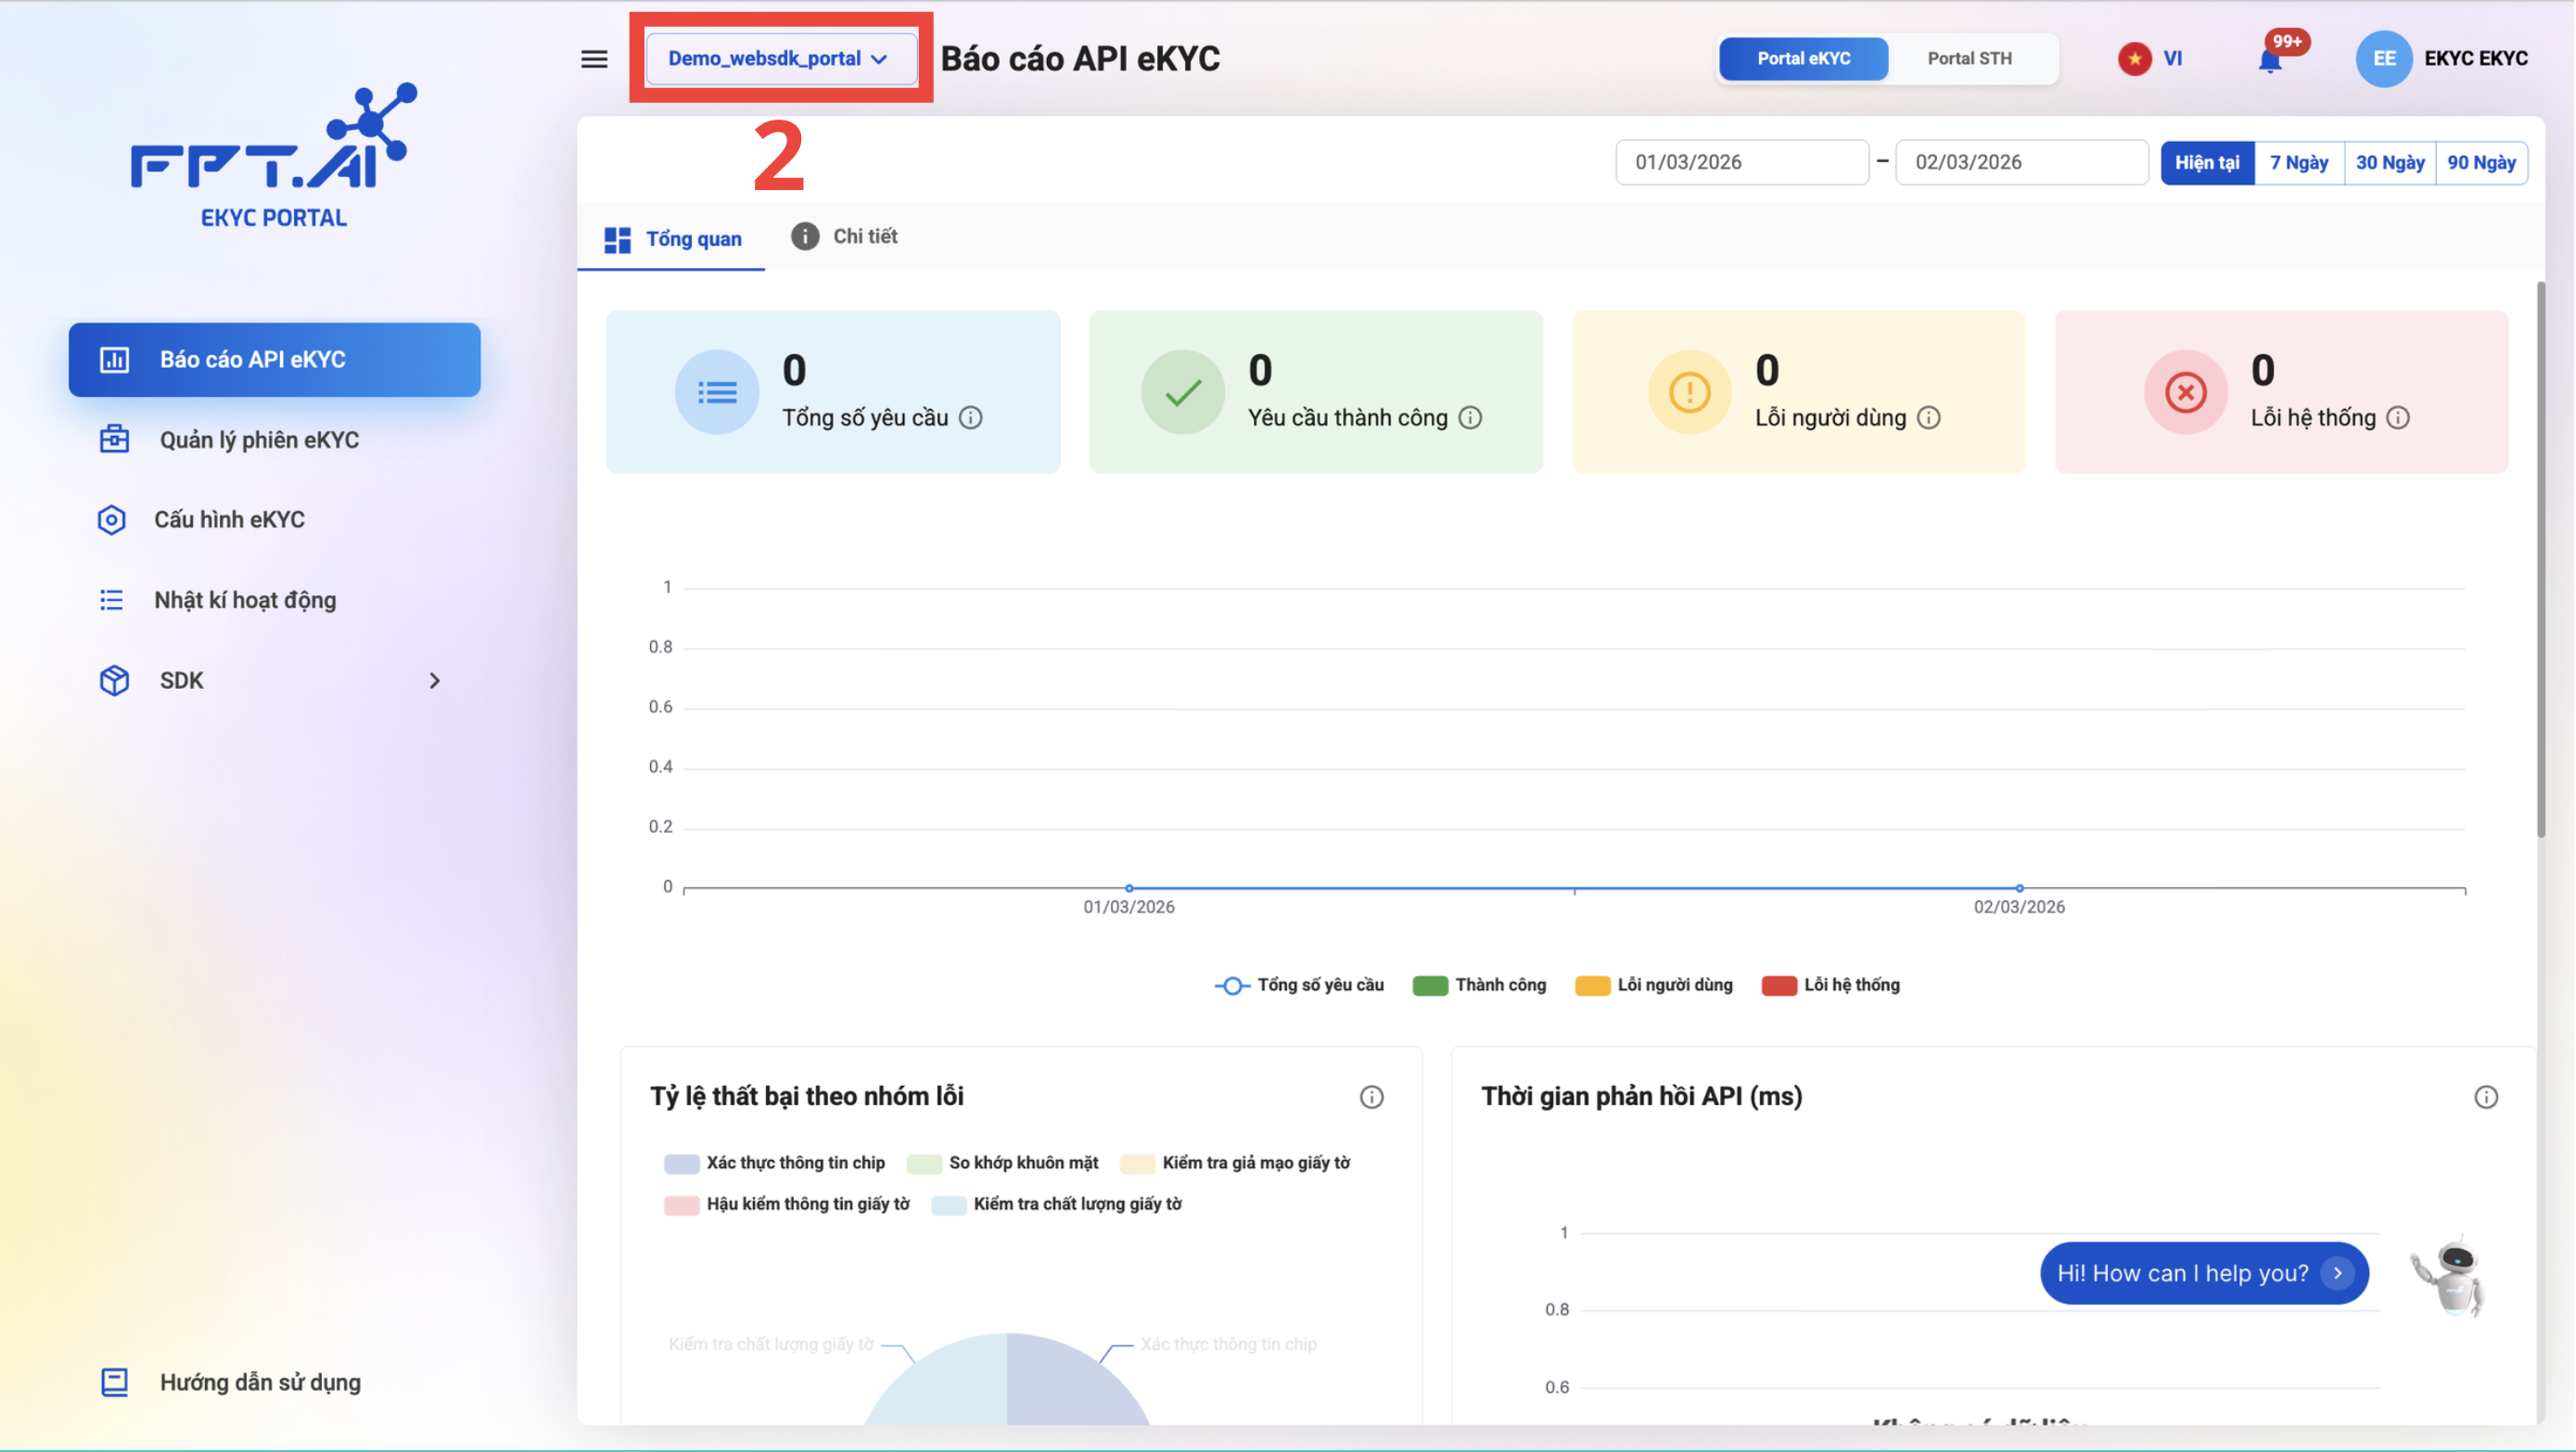 Step 2: After logging in, select a project. For example, the "admin" project.
3. API Report
Admins can view reports related to API usage, including Total API Requests, Total processed requests / user errors / system errors, and view details by request type.
Overview Dashboard:
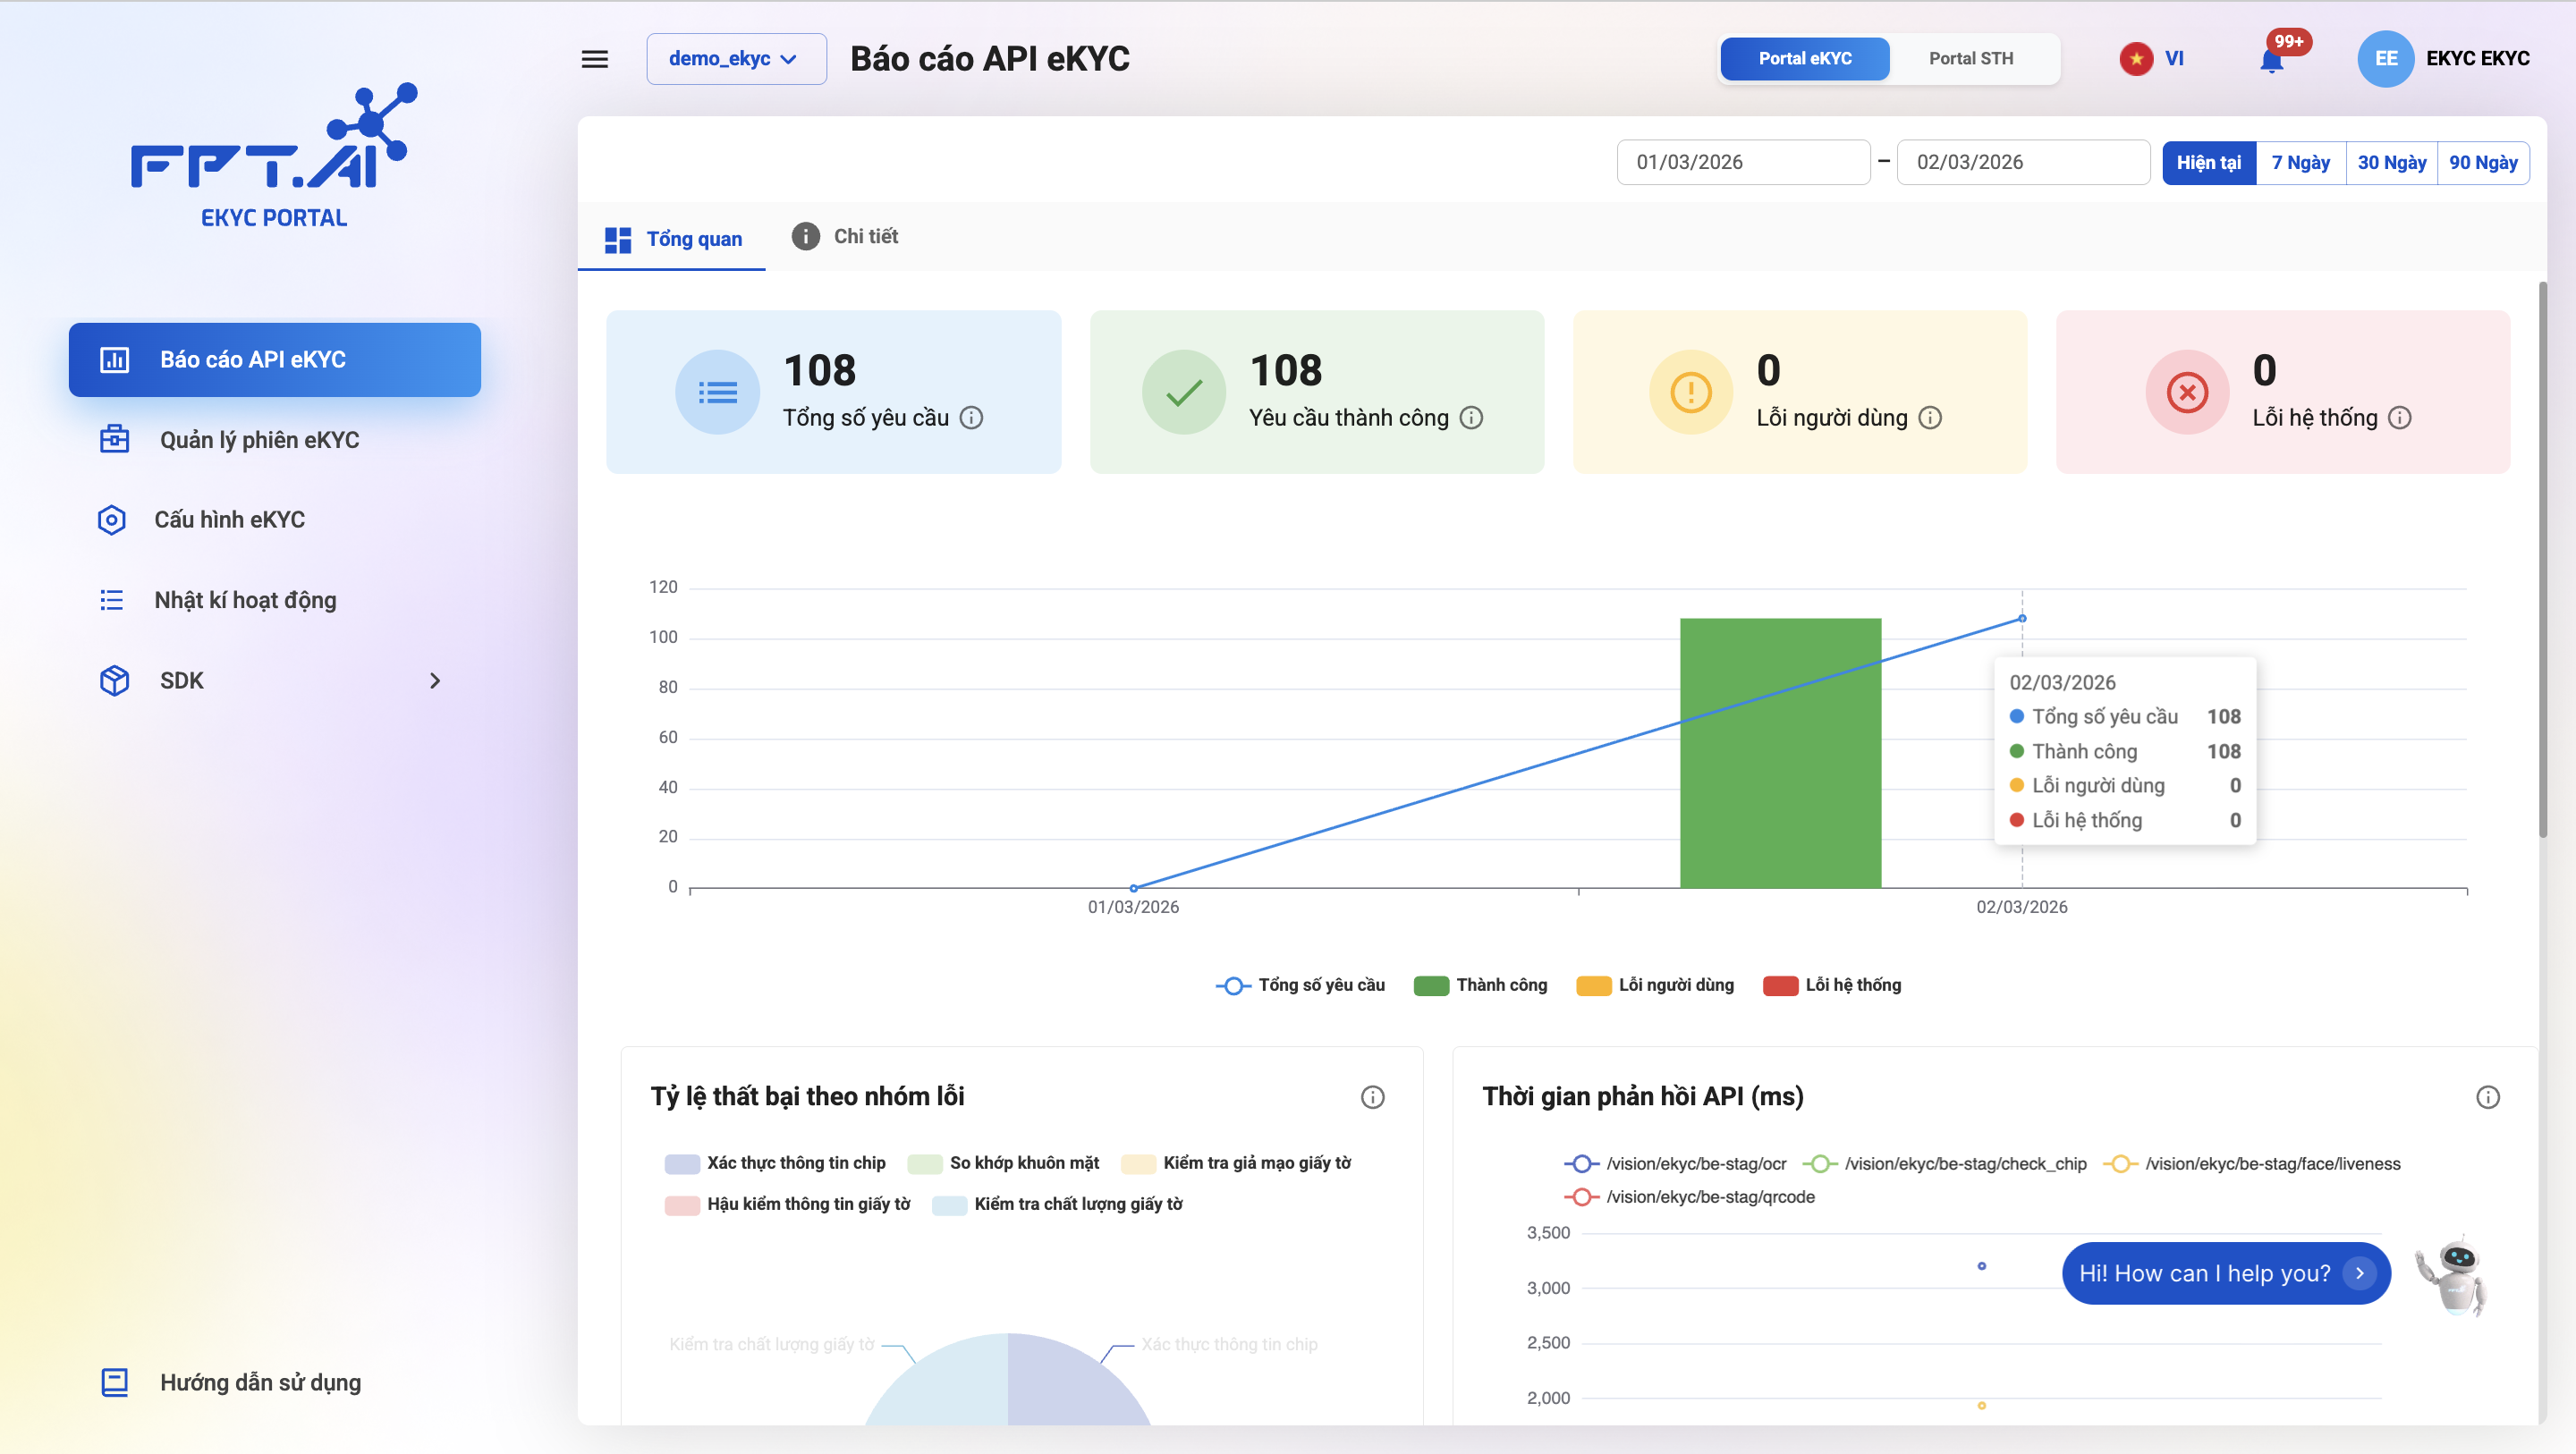
Step 1: Select "API Report" from the menu bar to display the current overview report.
Step 2: To view the API report for a specific time period, use the date picker function in the top right corner of the screen. There are 2 selection methods:
- Select start date and end date: Click the date field to open the calendar and select the desired time range by choosing a start date and an end date.
- Use quick time options: In addition to manual date selection, you can choose preset options such as "Current", "7 Days", "30 Days", or "90 Days".
Session Error Statistics Charts:

Failure Rate by Error Group Chart:
Displays the proportion of main error groups in the system, including:
- Chip information verification
- Face matching
- Document fraud detection
- Document post-checking
- Document quality check
Purpose:
- Monitor the failure rate of requests by error group
- Help categorize errors by group, making it easier to investigate and resolve issues
API Response Time (ms) Chart:
Displays daily response times for the following services:
/vision/ekyc/be-stag/ocr/vision/ekyc/be-stag/check_chip/vision/ekyc/be-stag/face/liveness/vision/ekyc/be-stag/qrcode
Vertical axis: Response time (ms) Horizontal axis: By day
Purpose:
- Monitor the average response time of each API
- Help detect APIs with slow response times that affect system performance
90P Request Count by Step (ms) Table:
Columns displayed:
- Service name
- Total requests
- Average latency
- 90th percentile latency
Purpose:
- The 90P metric means: 90% of requests have a processing time less than or equal to this value.
- Monitor the number of requests at the p90 level for each step in the eKYC session
- Measure system performance under high load conditions
Failure Rate by Error Code Chart
Displays details by common error codes and specific errors. Includes 2 tabs:
- Common errors
- Specific errors
Purpose:
- Monitor specific error rates
- Analyze common error codes to identify root causes and reduce errors
4. Session Management
In a user session, the user can make multiple requests to check each step in eKYC.
Session Management Overview Screen
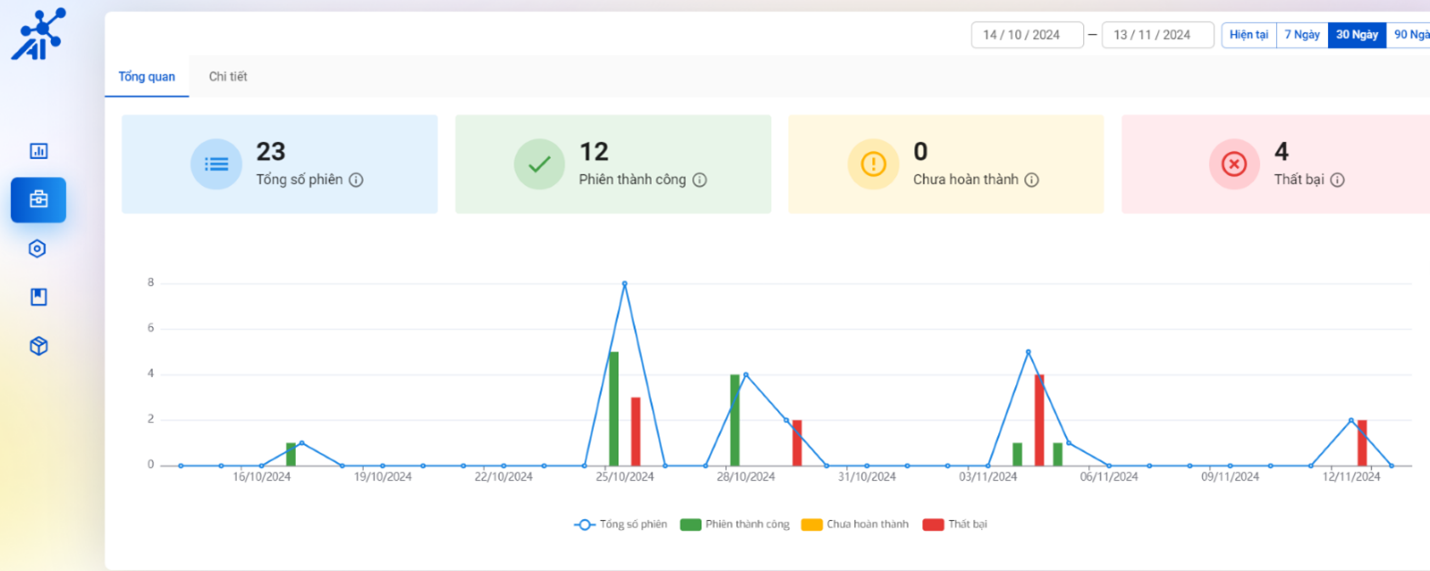
To view the session management overview report for custom time periods, follow the same steps as the API Report feature.
Where:
- Total sessions: Total number of sessions that successfully completed both OCR & liveness.
- Successful sessions: Total number of sessions that the customer called to FPT.
- Incomplete: Total number of sessions that only performed OCR and stopped.
- Failed: Total number of sessions where the user failed liveness.
Session Management Detail Screen
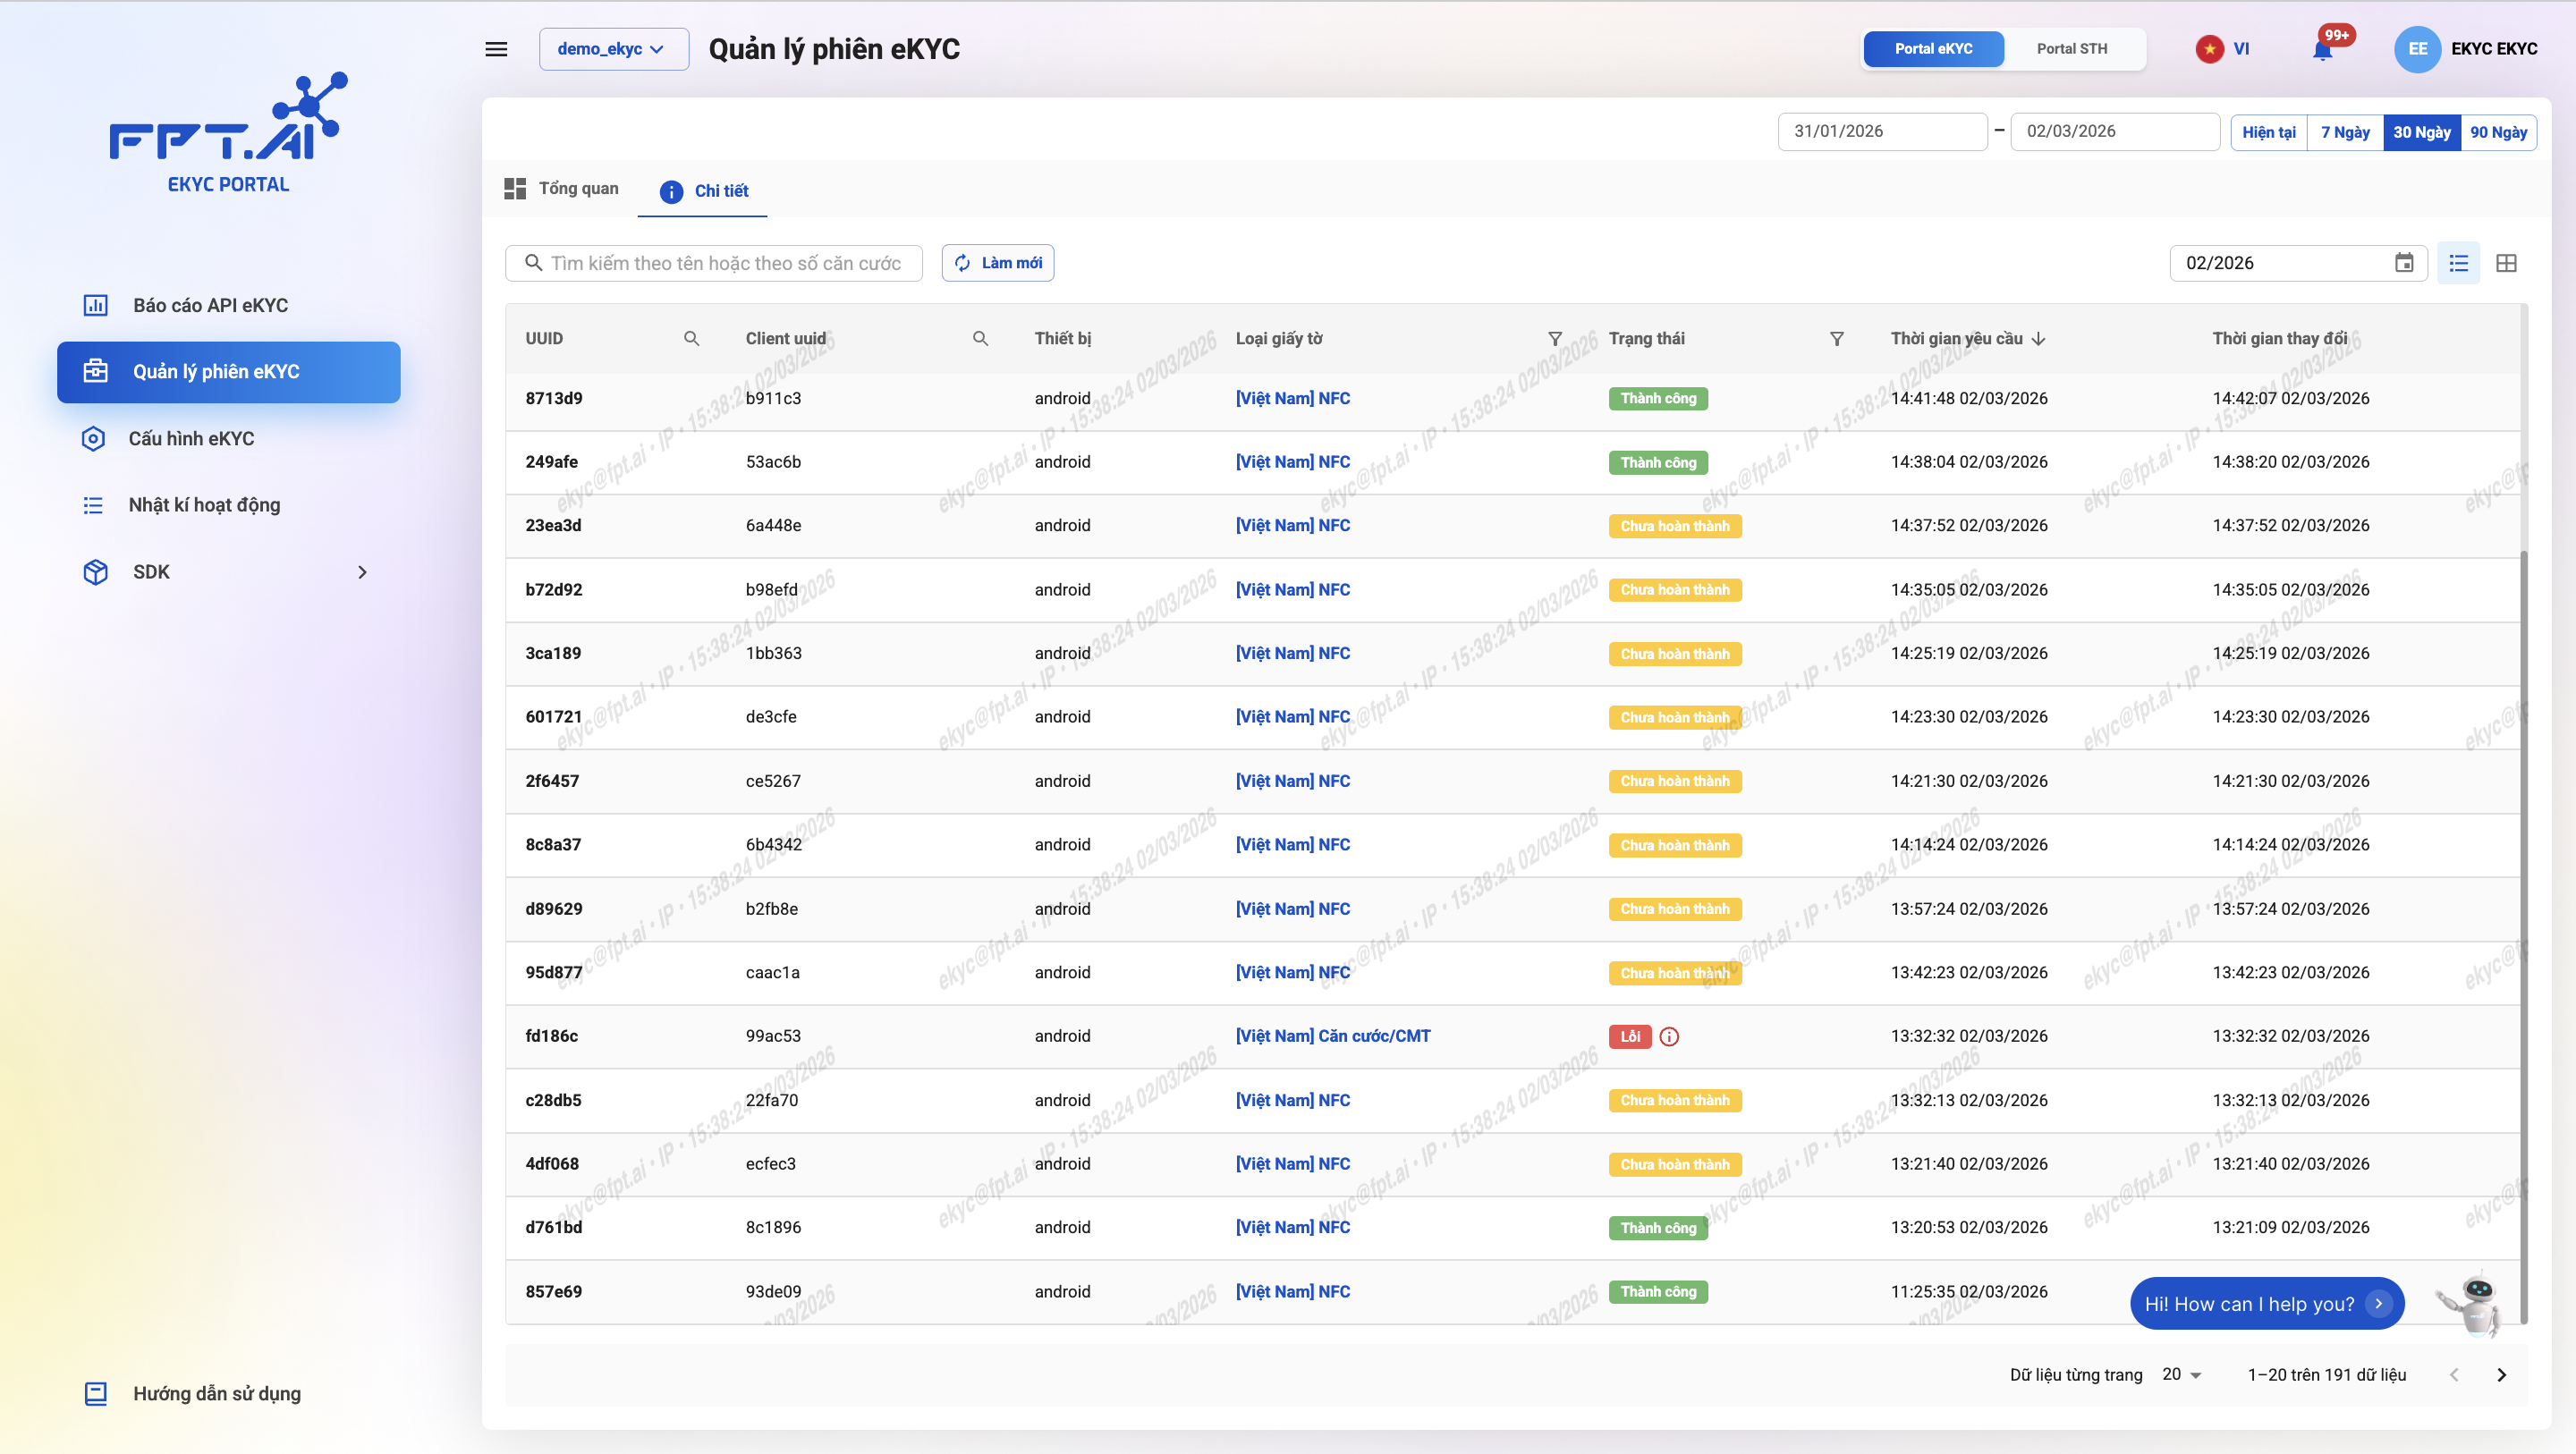
The detail screen displays the list and history details of executed sessions.
The list includes the following information:
- UUID
- Client ID
- Device
- Document type
- Status: Success, Error, Expired, Incomplete
- Request time, Last modified time
To view detailed information of a session, click the eye icon to open the detail screen.
Session Management Detail Screen 2
Session Management Detail displays detailed information of a customer's eKYC session.

- Left side of the screen: displays images of the ID card or other documents such as passport, driver's license, etc. (front, back) and the customer's selfie photo during eKYC.
- Right side of the screen: displays the OCR results of the document and the Liveness Check results.
Request History Screen
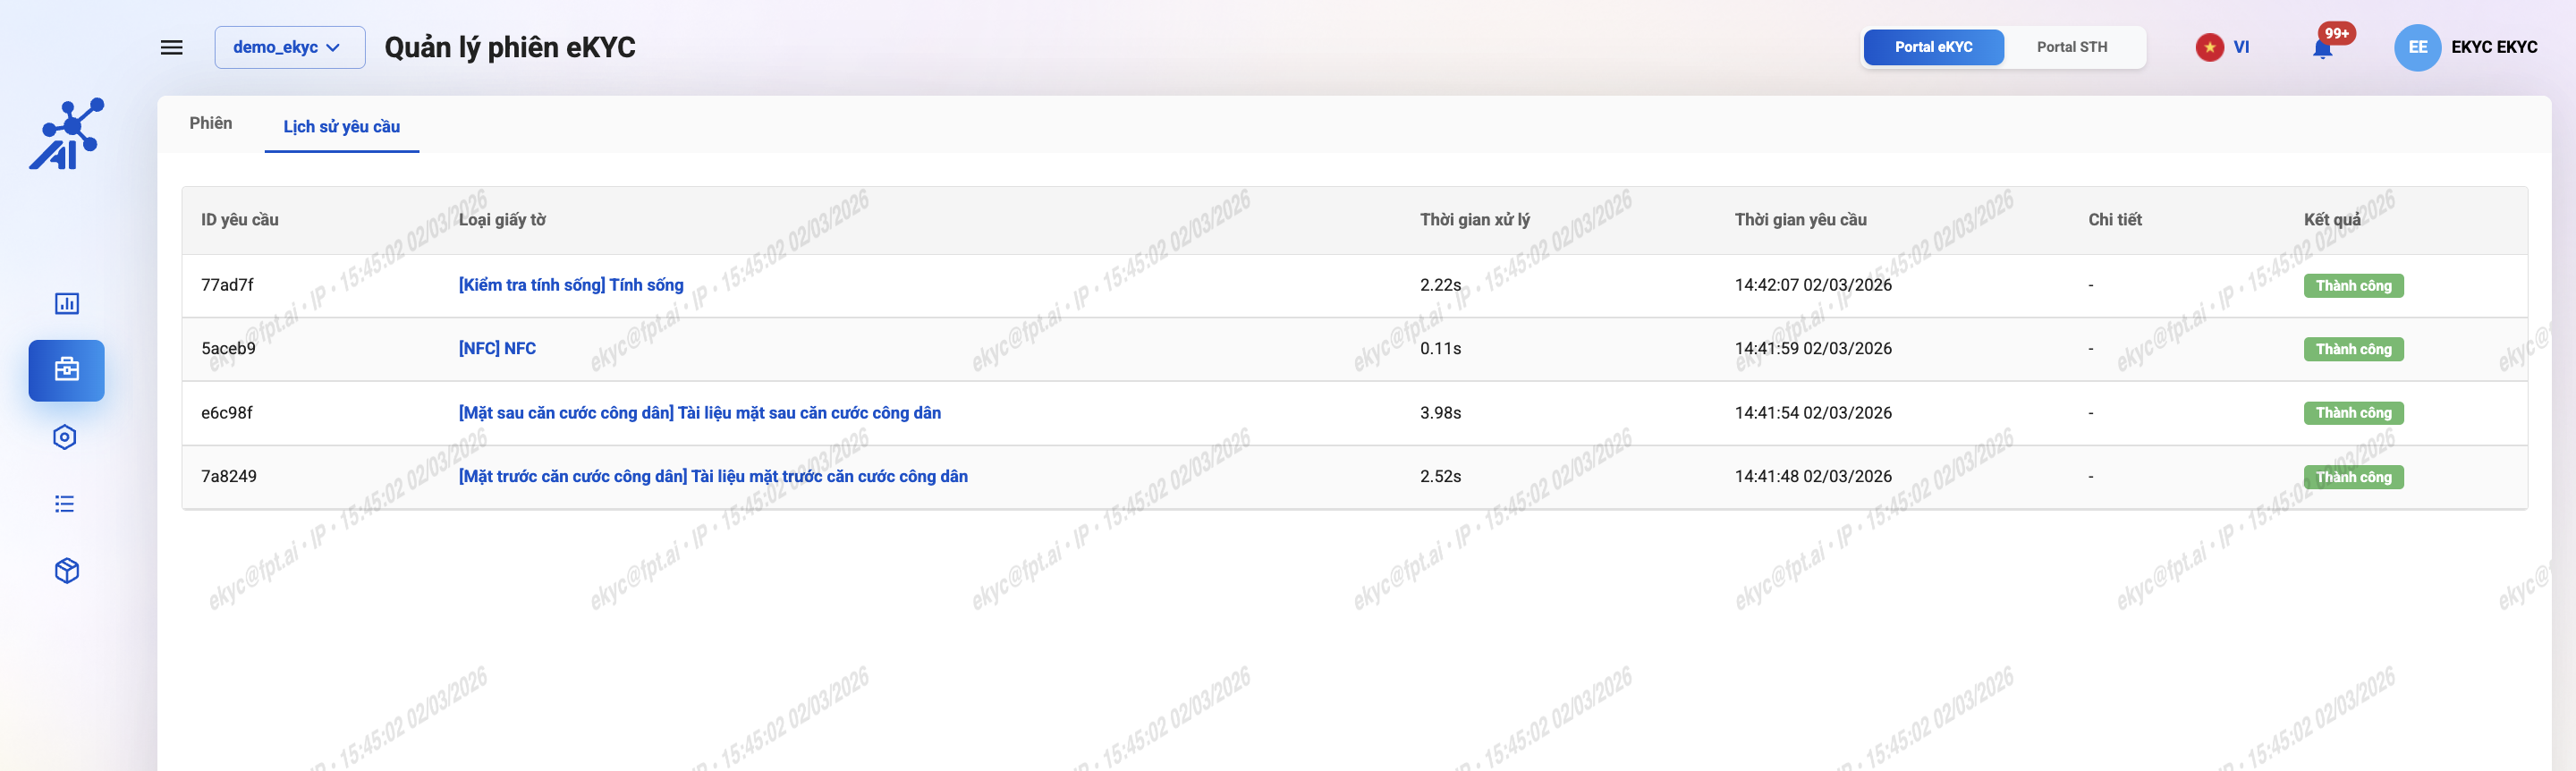
Displays the list of API requests made within a customer session.
Information includes:
- Request ID
- Document type
- Processing time
- Request time
- Details
- Result
5. Configuration
FPT will provide consultation for appropriate configuration based on each customer's needs. Customers should be cautious and refrain from self-configuring to avoid affecting the efficiency of the usage flow.
Configuration changes on the system will be applied immediately for API/SDK versions related to the selected project.
a. General
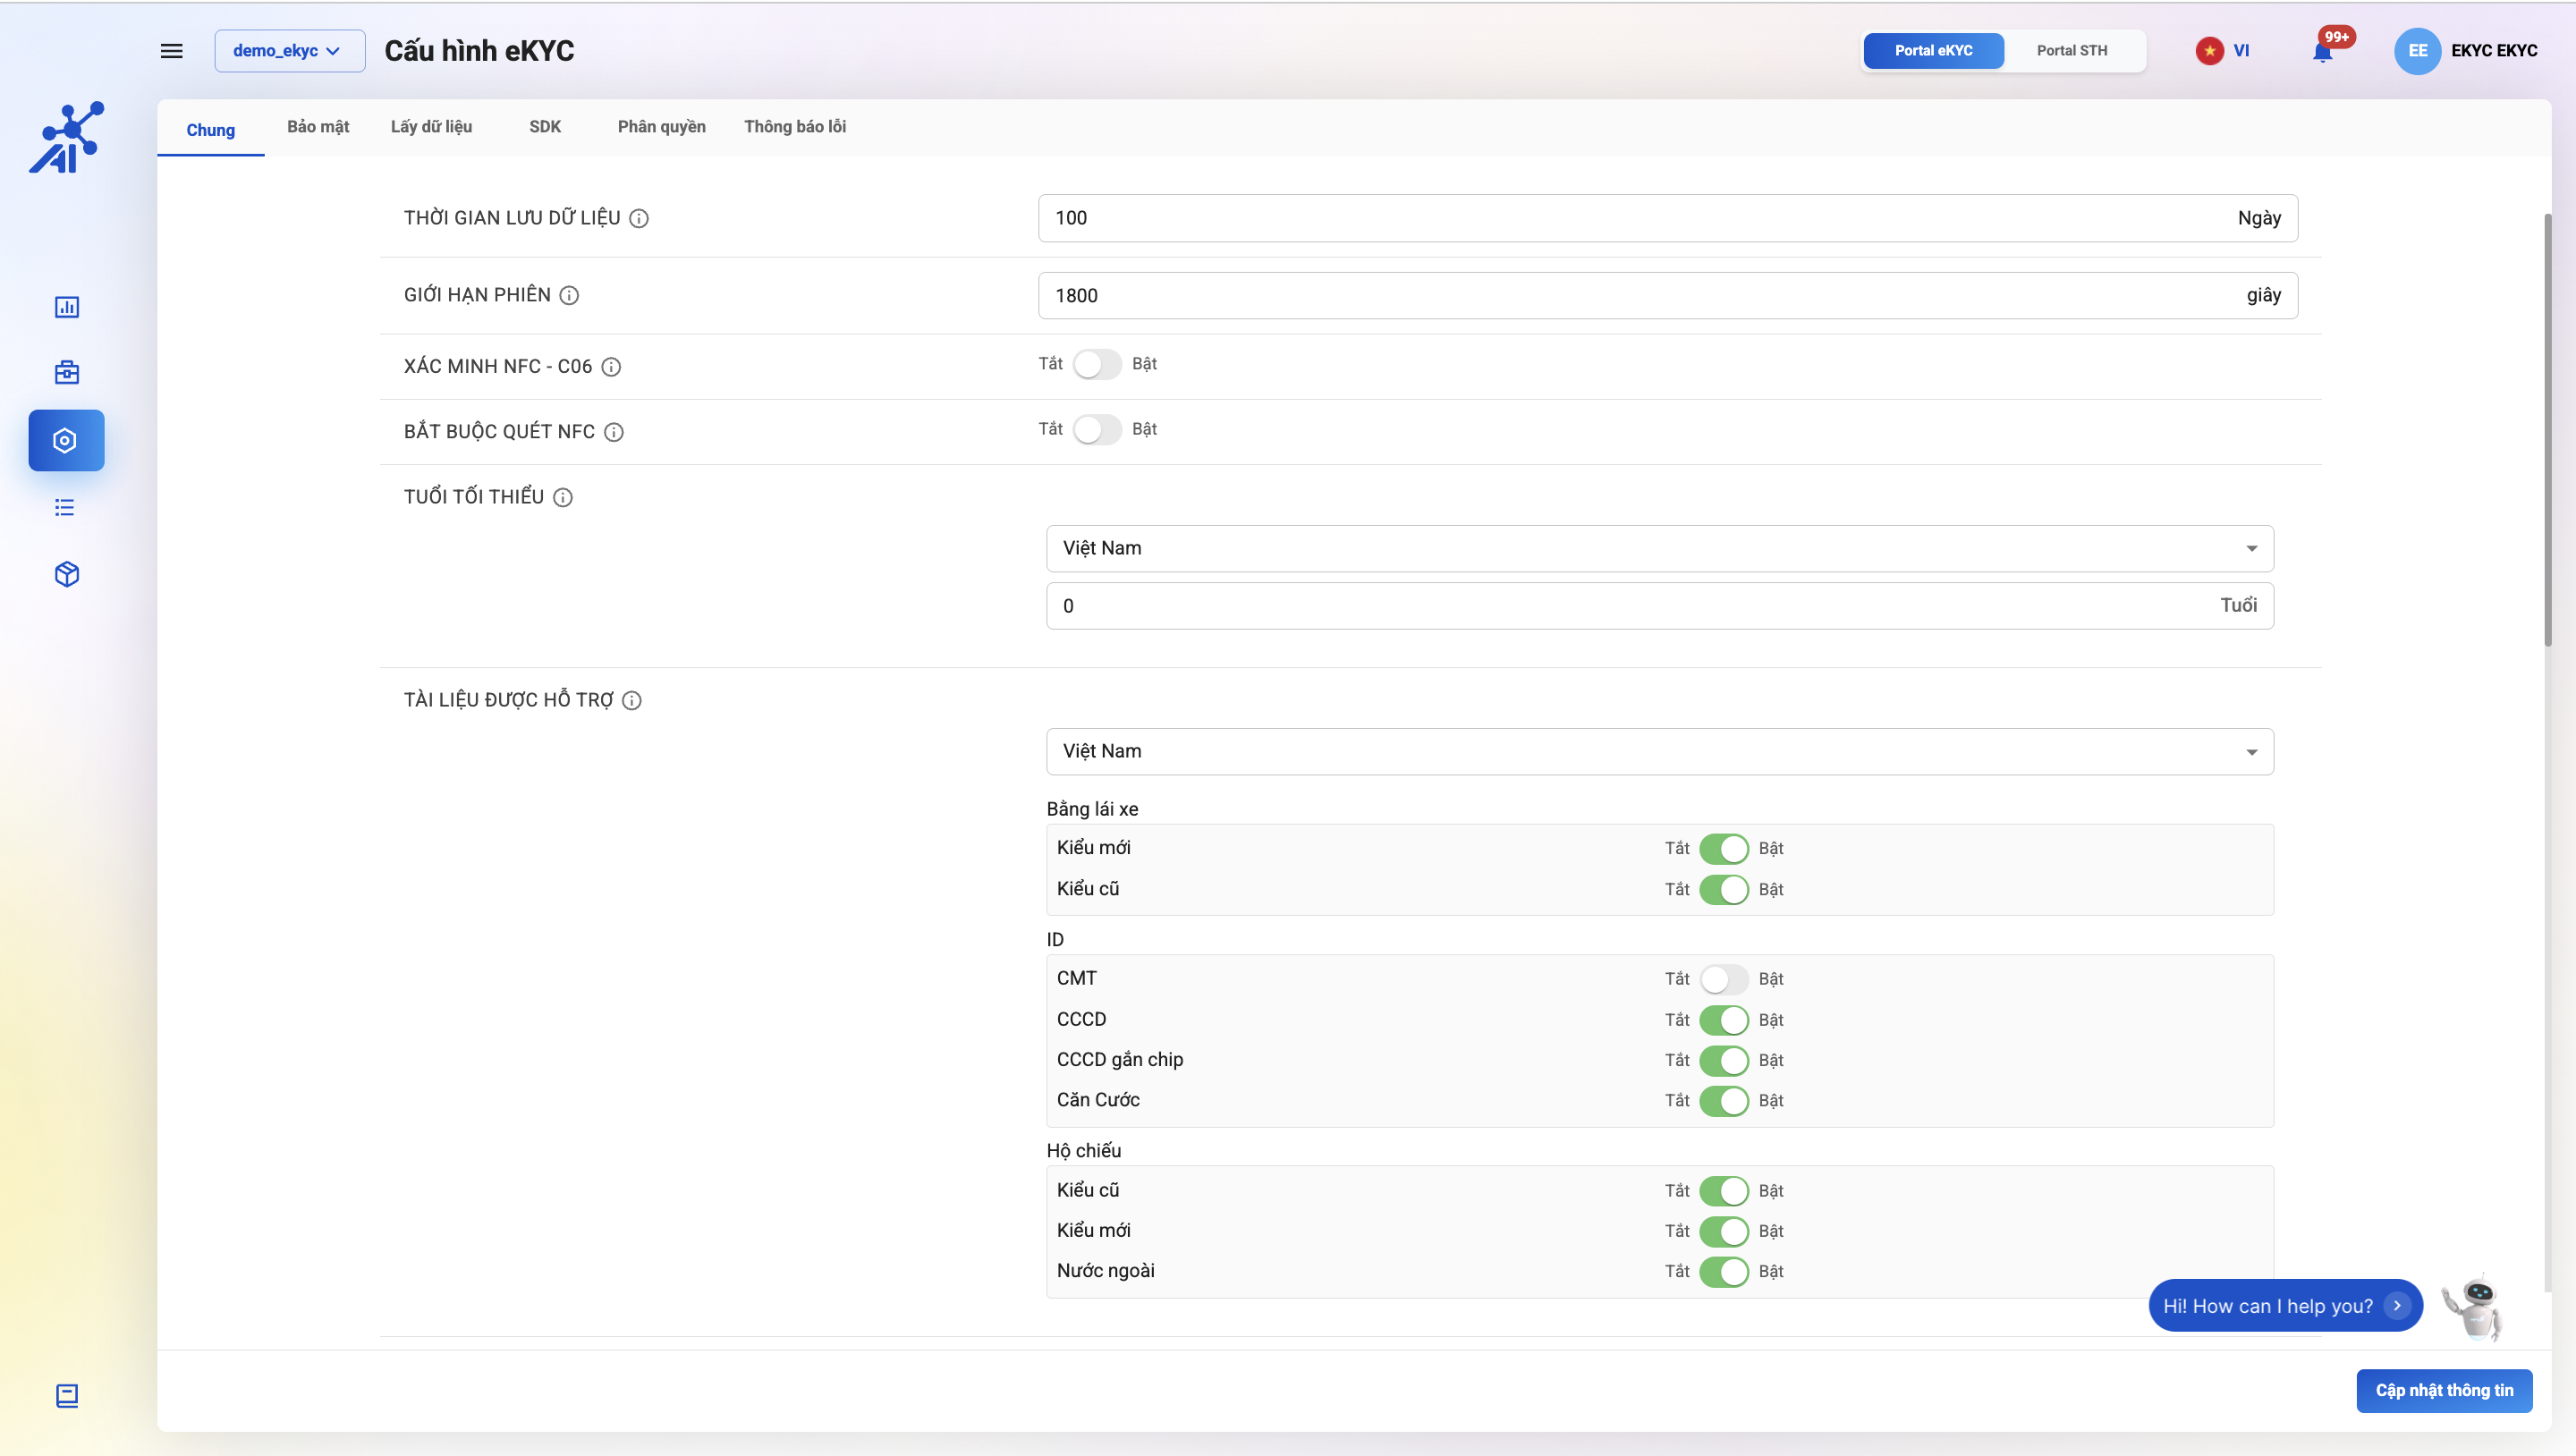
| No. | Field | Description |
|---|---|---|
| 1 | Data retention period | The duration FPT retains personal data, ID card images, and selfie images of customers. Unit: days |
| 2 | Session limit | The time limit for one eKYC session. If exceeded, the session will expire. Unit: seconds |
| 3 | NFC verification | NFC verification to read information from the chip-enabled ID card. Allows enabling/disabling NFC verification |
| 4 | Mandatory NFC scan | Mandatory NFC scanning to read information from the chip-enabled ID card. Allows enabling/disabling mandatory NFC scanning |
| 5 | Minimum age | Select territory and minimum valid age. Different territories may have different minimum ages |
| 6 | Supported documents | Select territory and supported documents. For different territories, document information will vary. Documents set to "Off" will return an "Invalid image" error when called |
| 7 | Custom list | Allows adjusting the information fields to check: |
| - Enable custom threshold: Allows customizing the threshold for evaluation criteria. If disabled, evaluation thresholds will use default values as assessed and optimized by FPT | ||
| - Enable Quality Check: Errors related to input quality | ||
| - Correct name from QR code: Automatically corrects the name in OCR results to the name in the QR code if the OCR result differs from the QR code name in Vietnamese diacritics | ||
| - Enable Fraud Check: Errors related to fraud | ||
| - Enable Post Check: Errors related to document validity based on OCR content | ||
| - By pass count: The threshold that allows a user to bypass rule checks | ||
| - Enable Warning Detection: Errors related to Liveness | ||
| - Enable warning detection: Warnings during Liveness check | ||
| - Face match version: Select the face matching version. Image pairs with a probability score higher than the configured threshold are considered a match | ||
| - Facematch: Customize the face matching threshold | ||
| - Activate: Enable/Disable check | ||
| - Severity: | ||
| - Medium: FPT returns success + warning | ||
| - High: FPT returns reject + warning | ||
| - Threshold: The sensitivity level for triggering error codes. The higher the threshold, the stricter the evaluation and the higher the rejection rate |
b. Security

Allows enabling/disabling data protection mechanisms during eKYC system integration and operation, including:
- Data encryption in transit
- Data encryption at rest
- Client UUID authenticity verification
| No. | Field | Description |
|---|---|---|
| 1 | Data encryption in transit | Data encryption in transit ensures the security and safety of data during transmission. This option is disabled by default |
| 2 | Data encryption at rest | Data encryption at rest ensures the security and safety of data during storage. This option is disabled by default |
| 3 | Client UUID authenticity verification | Client UUID authenticity verification is an additional security mechanism (besides API key and token) to ensure that requests received by the eKYC system are genuinely from the customer. This option is disabled by default |
c. Data Retrieval
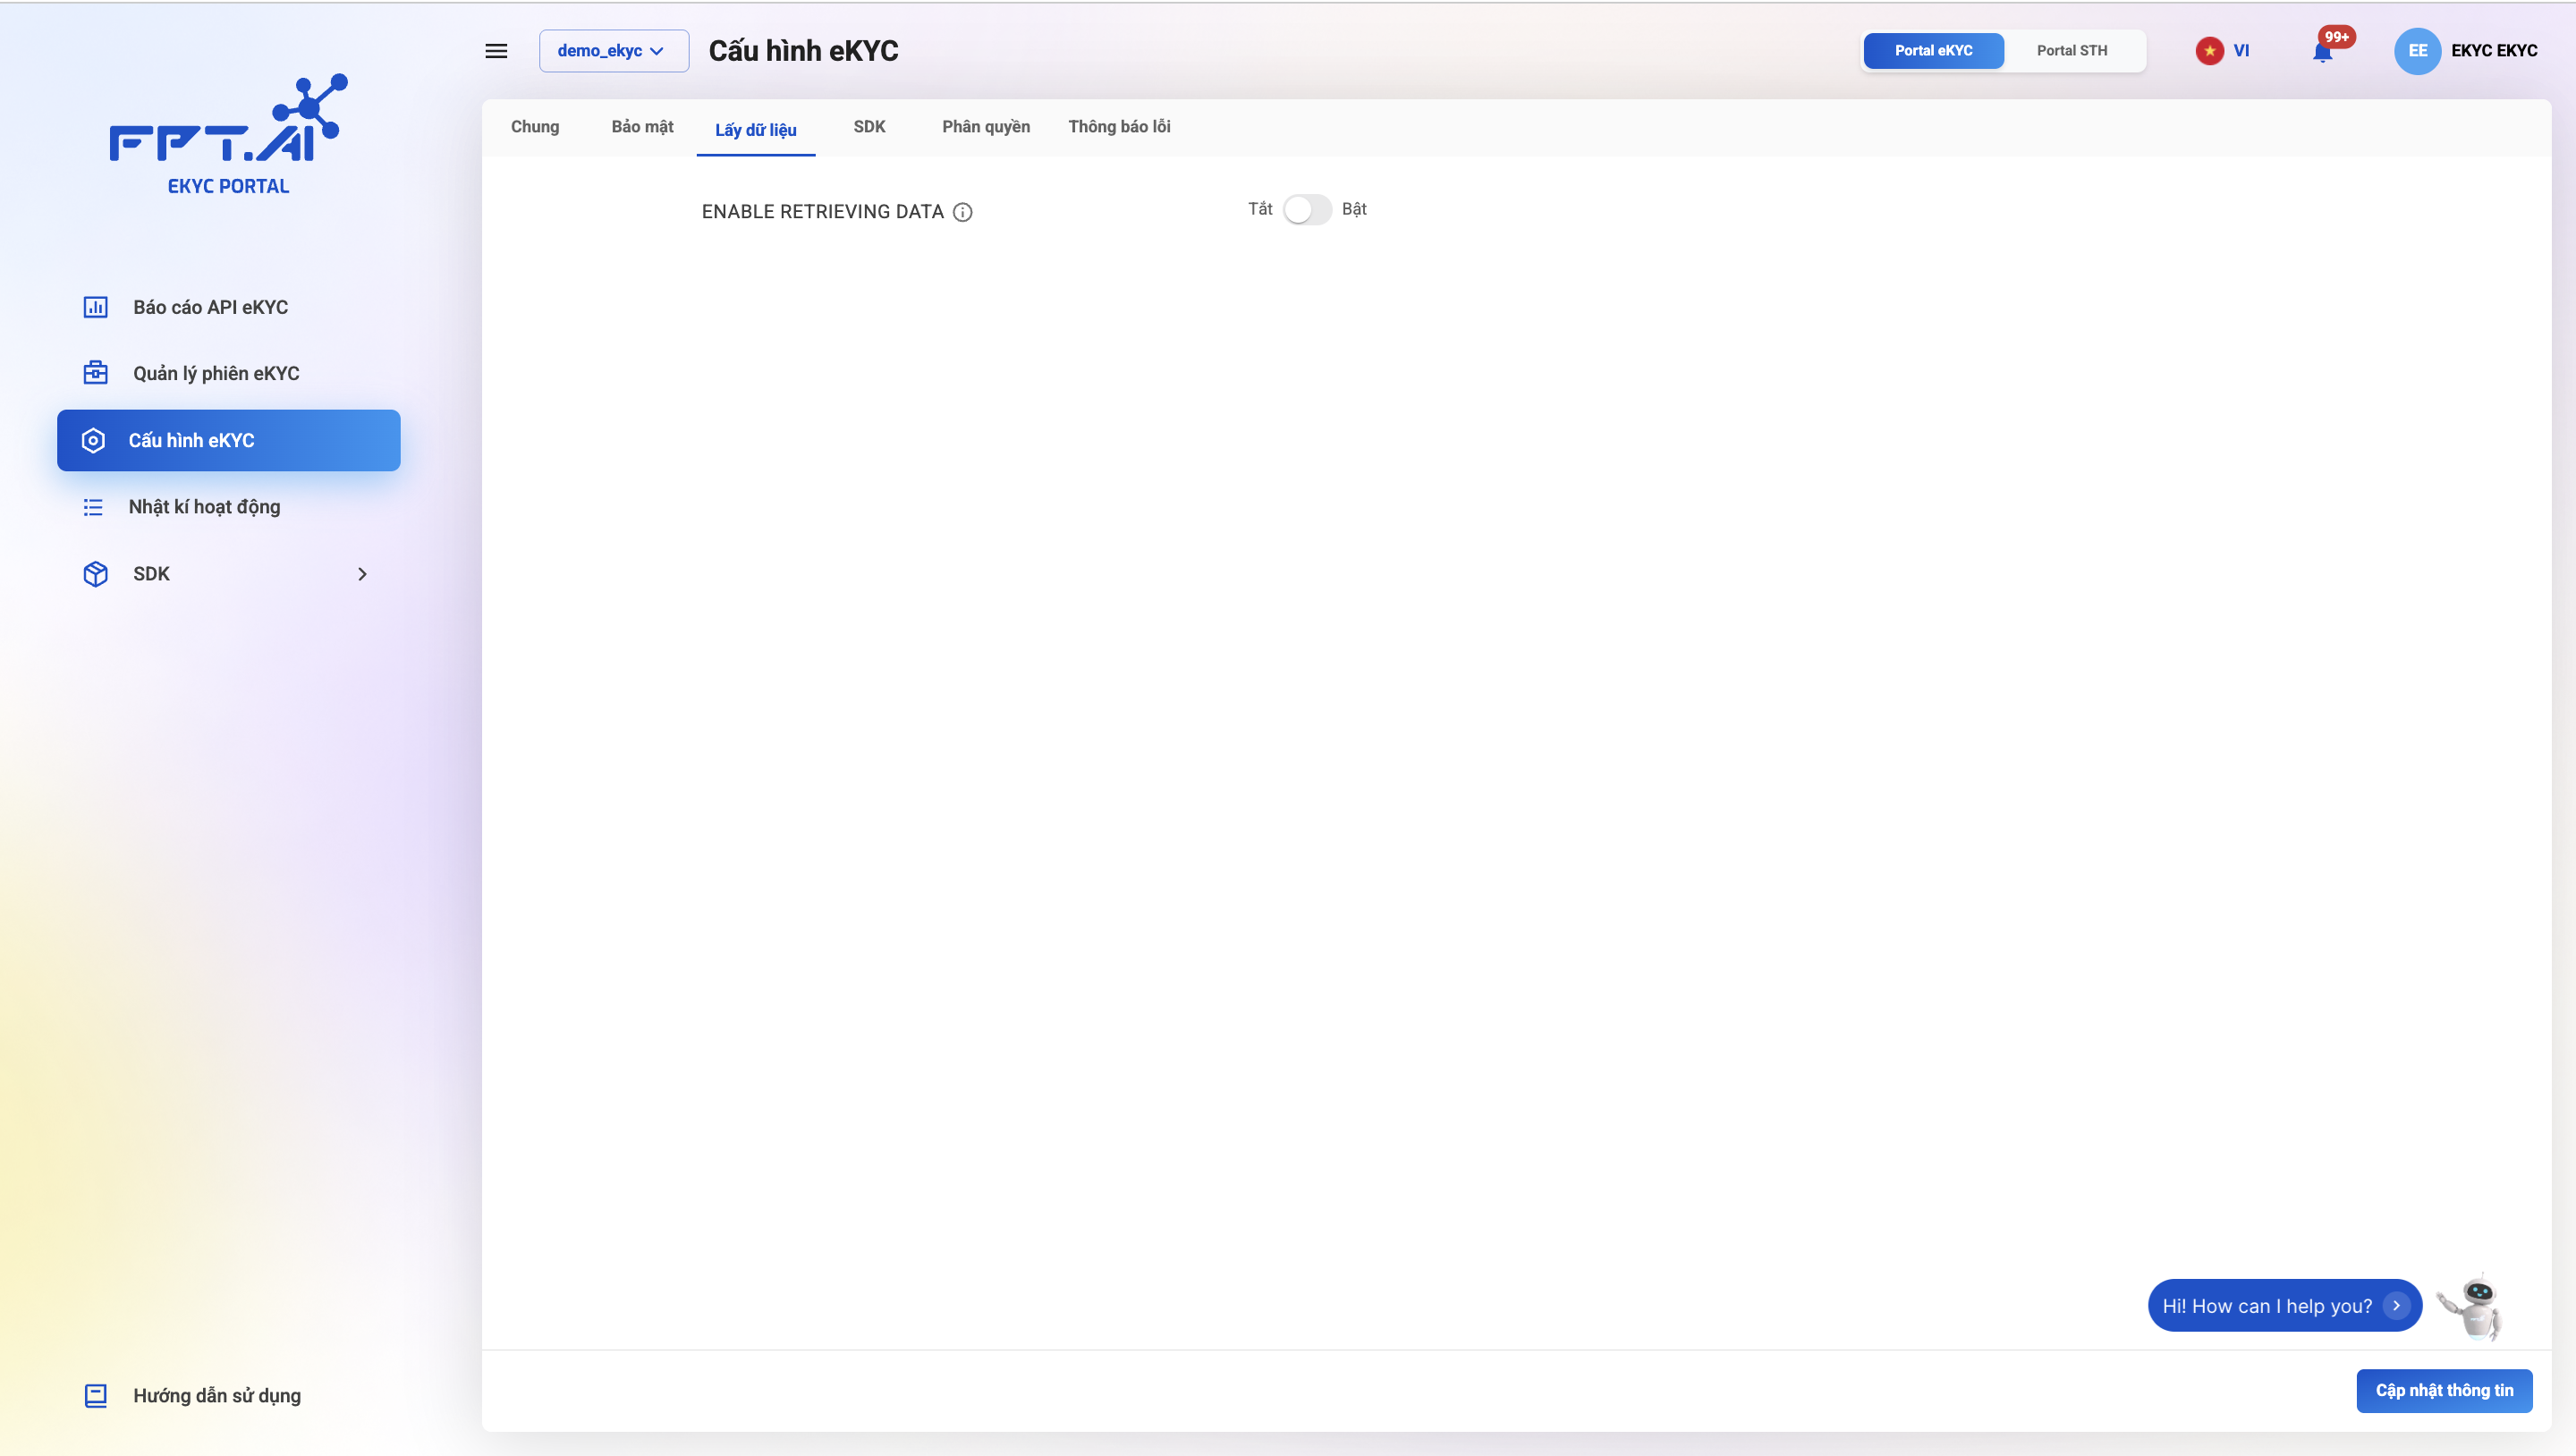
| No. | Field | Description |
|---|---|---|
| # | ENABLE RETRIEVING DATA | Enable/Disable the method of returning/retrieving data from the FPT AI eKYC system |
| - Method where the eKYC system actively sends data via callback API to the customer | ||
| - Method where the customer retrieves data from the eKYC system (requires data storage to be enabled) |
d. SDK
Allows enabling/disabling options for eKYC SDKs
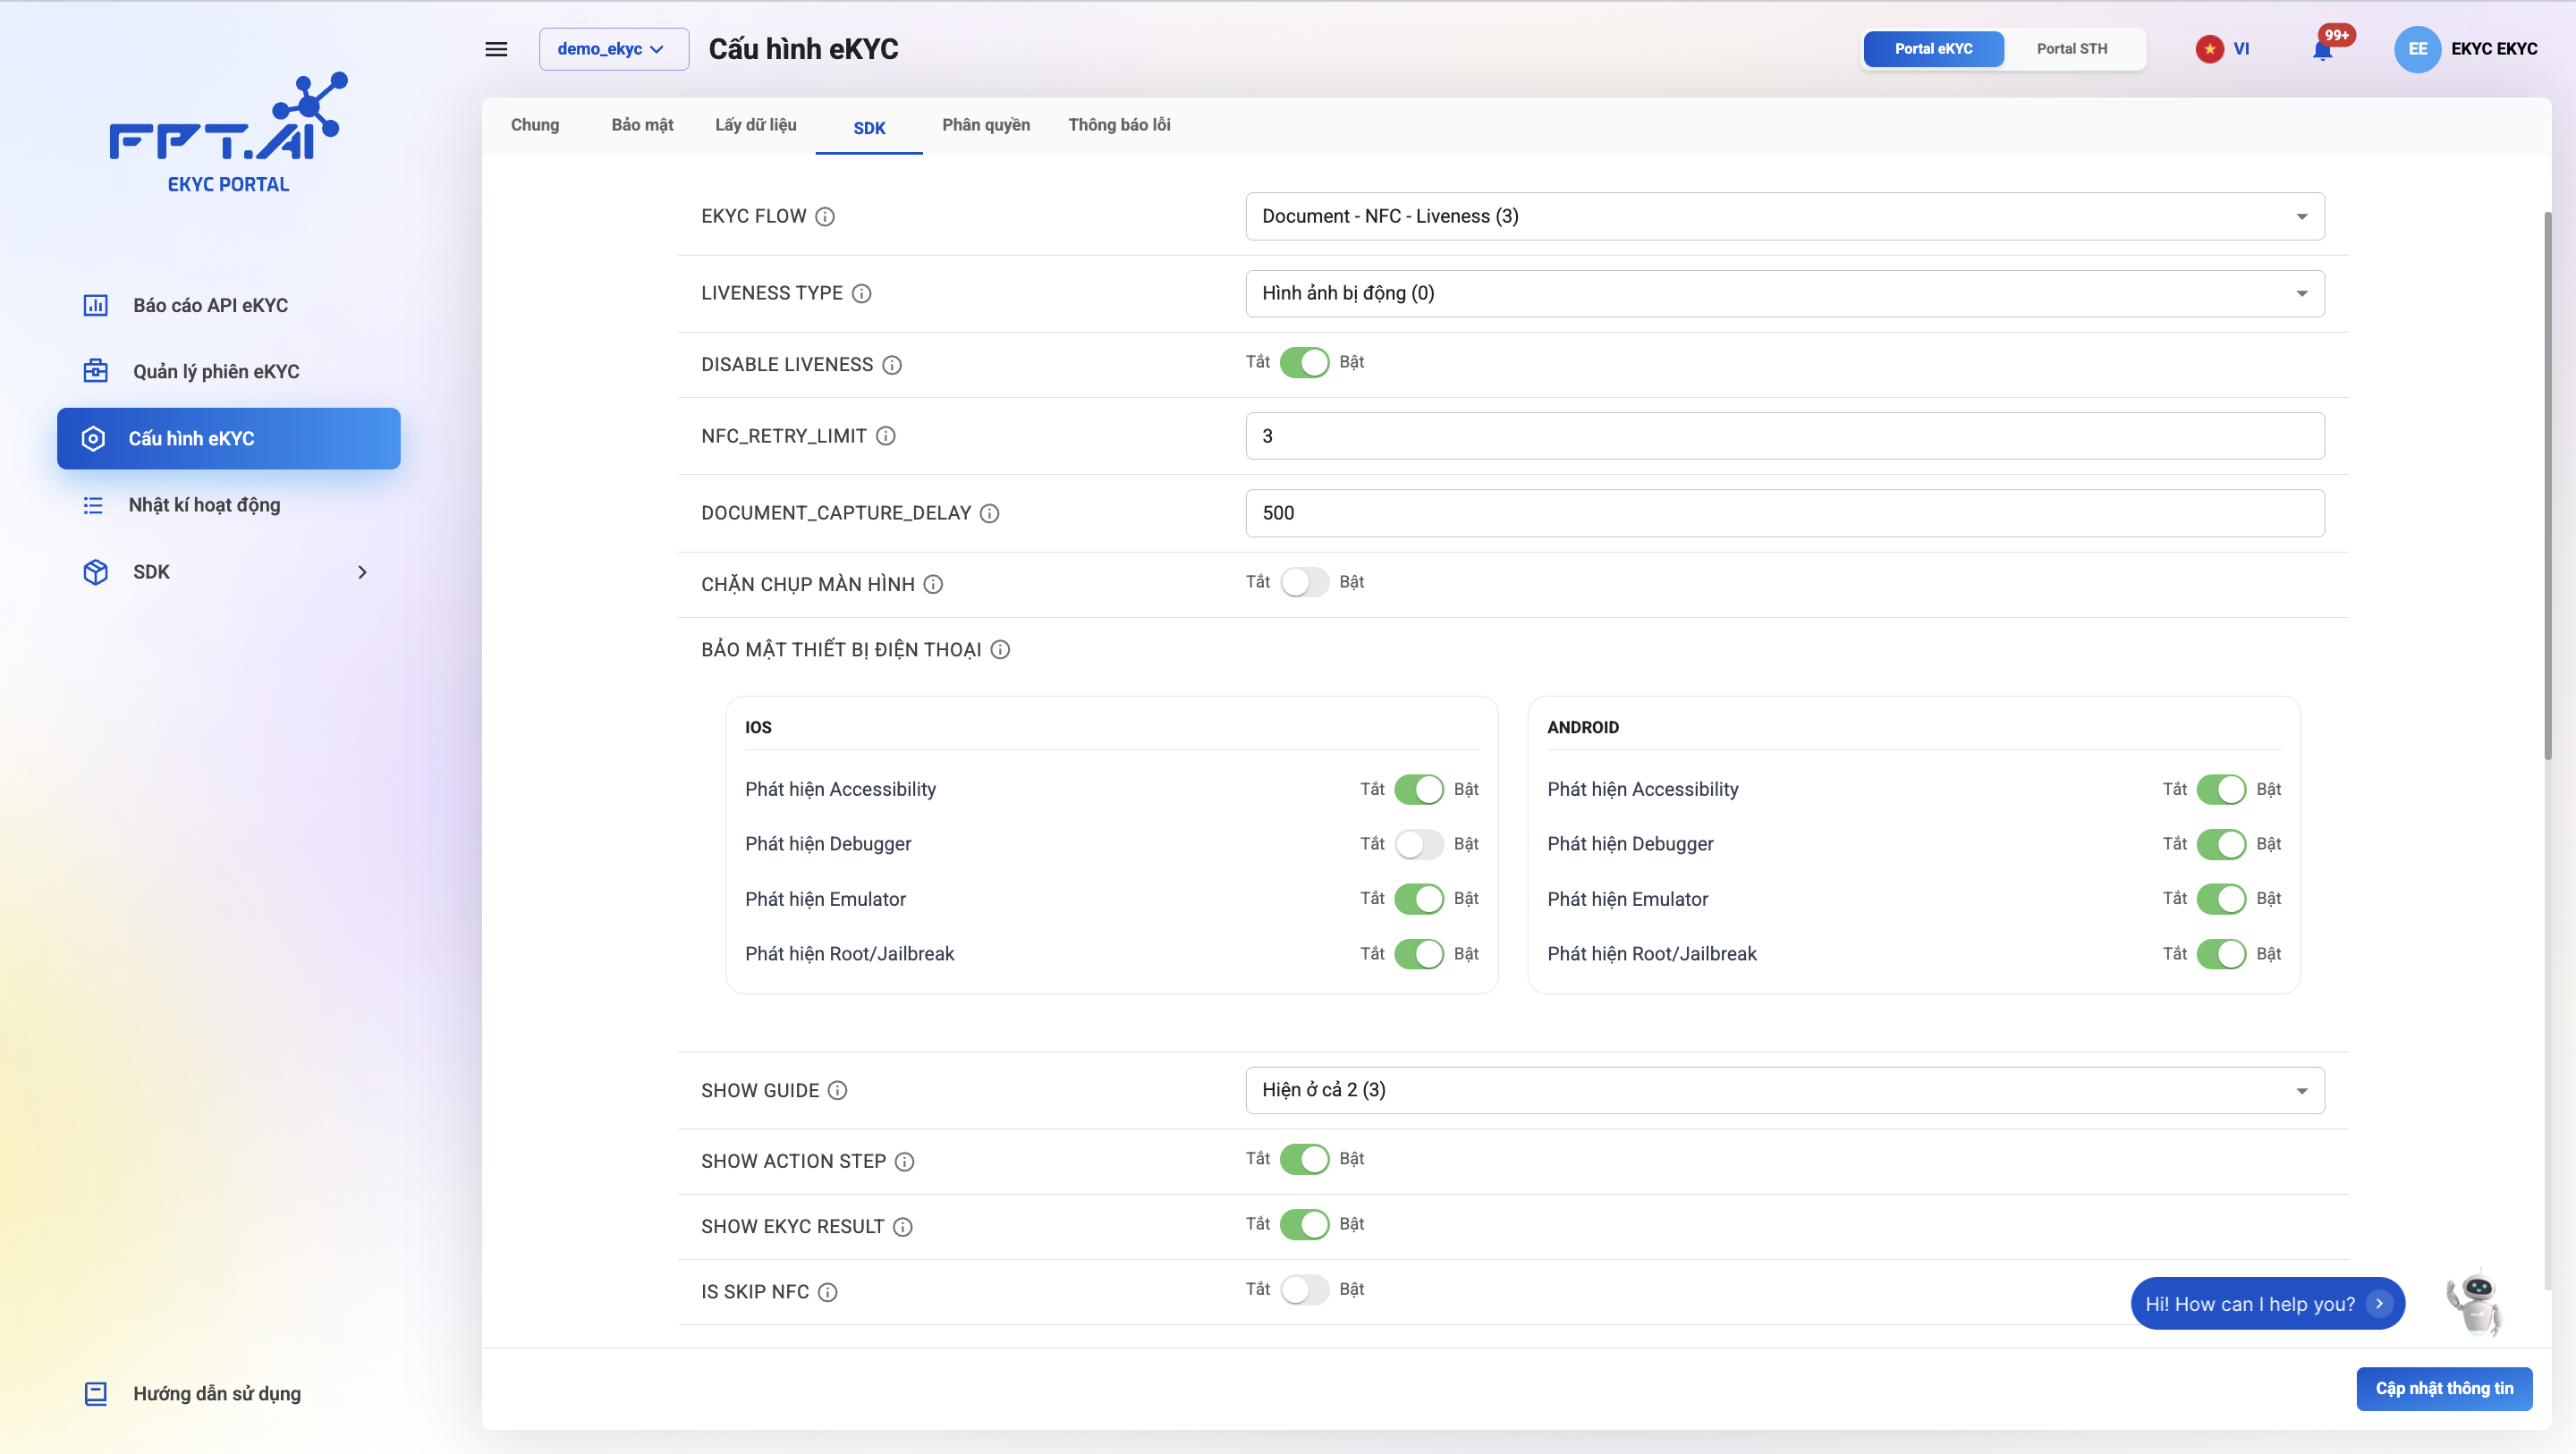
| No. | Field | Description |
|---|---|---|
| 1 | eKYC FLOW | Select eKYC flows on Mobile SDK suitable for each customer's needs and use cases |
| 2 | LIVENESS TYPE | Select supported liveness check types |
| 3 | DISABLE LIVENESS | Enable/Disable Liveness check in SDK |
| 4 | NFC_RETRY_LIMIT | Configure the number of NFC scan retries allowed after the first failure in a session |
| 5 | DOCUMENT_CAPTURE_DELAY | Configure the capture delay for auto document capture |
| 6 | BLOCK SCREENSHOT | Enable/Disable screenshot blocking during eKYC |
| 7 | MOBILE DEVICE SECURITY | Configure device security check mechanisms per OS: iOS / Android |
| - Detect Accessibility: Enable/Disable detection of Accessibility tools that could be exploited to interfere with the system | ||
| - Detect Debugger: Enable/Disable detection of devices with debug mode enabled | ||
| - Detect Emulator: Enable/Disable detection of apps running on emulators | ||
| - Detect Root/Jailbreak: Enable/Disable detection of rooted (Android) or jailbroken (iOS) devices | ||
| 8 | SHOW GUIDE | Select the scope of guide display in SDK: Disable guide / Show only at OCR step / Show only at liveness step / Show at all steps |
| 9 | SHOW ACTION STEP | Enable/Disable display of the next step |
| 10 | SHOW eKYC RESULT | Enable/Disable display of eKYC result |
| 11 | IS SKIP NFC | Enable/Disable skipping the NFC step |
| 12 | LIMIT | Configure the number of liveness check retries allowed after the first failure |
| 13 | SHOW_SWITCH_ANIMATION | Enable/Disable the switch animation button |
| 14 | SHOW SWITCH BUTTON | Enable/Disable the manual/auto capture mode switch button |
| 15 | SCAN_QR_MODE | Enable/Disable QR code scanning |
| 16 | SHOW_EXIT_DIALOG | Enable/Disable the exit confirmation dialog when the user exits the flow midway |
| 17 | SHOW_LABEL_STEP | Enable/Disable display of step labels |
| 18 | FONT PATH | Set display fonts for the interface |
6. SDK
SDK Download Screen
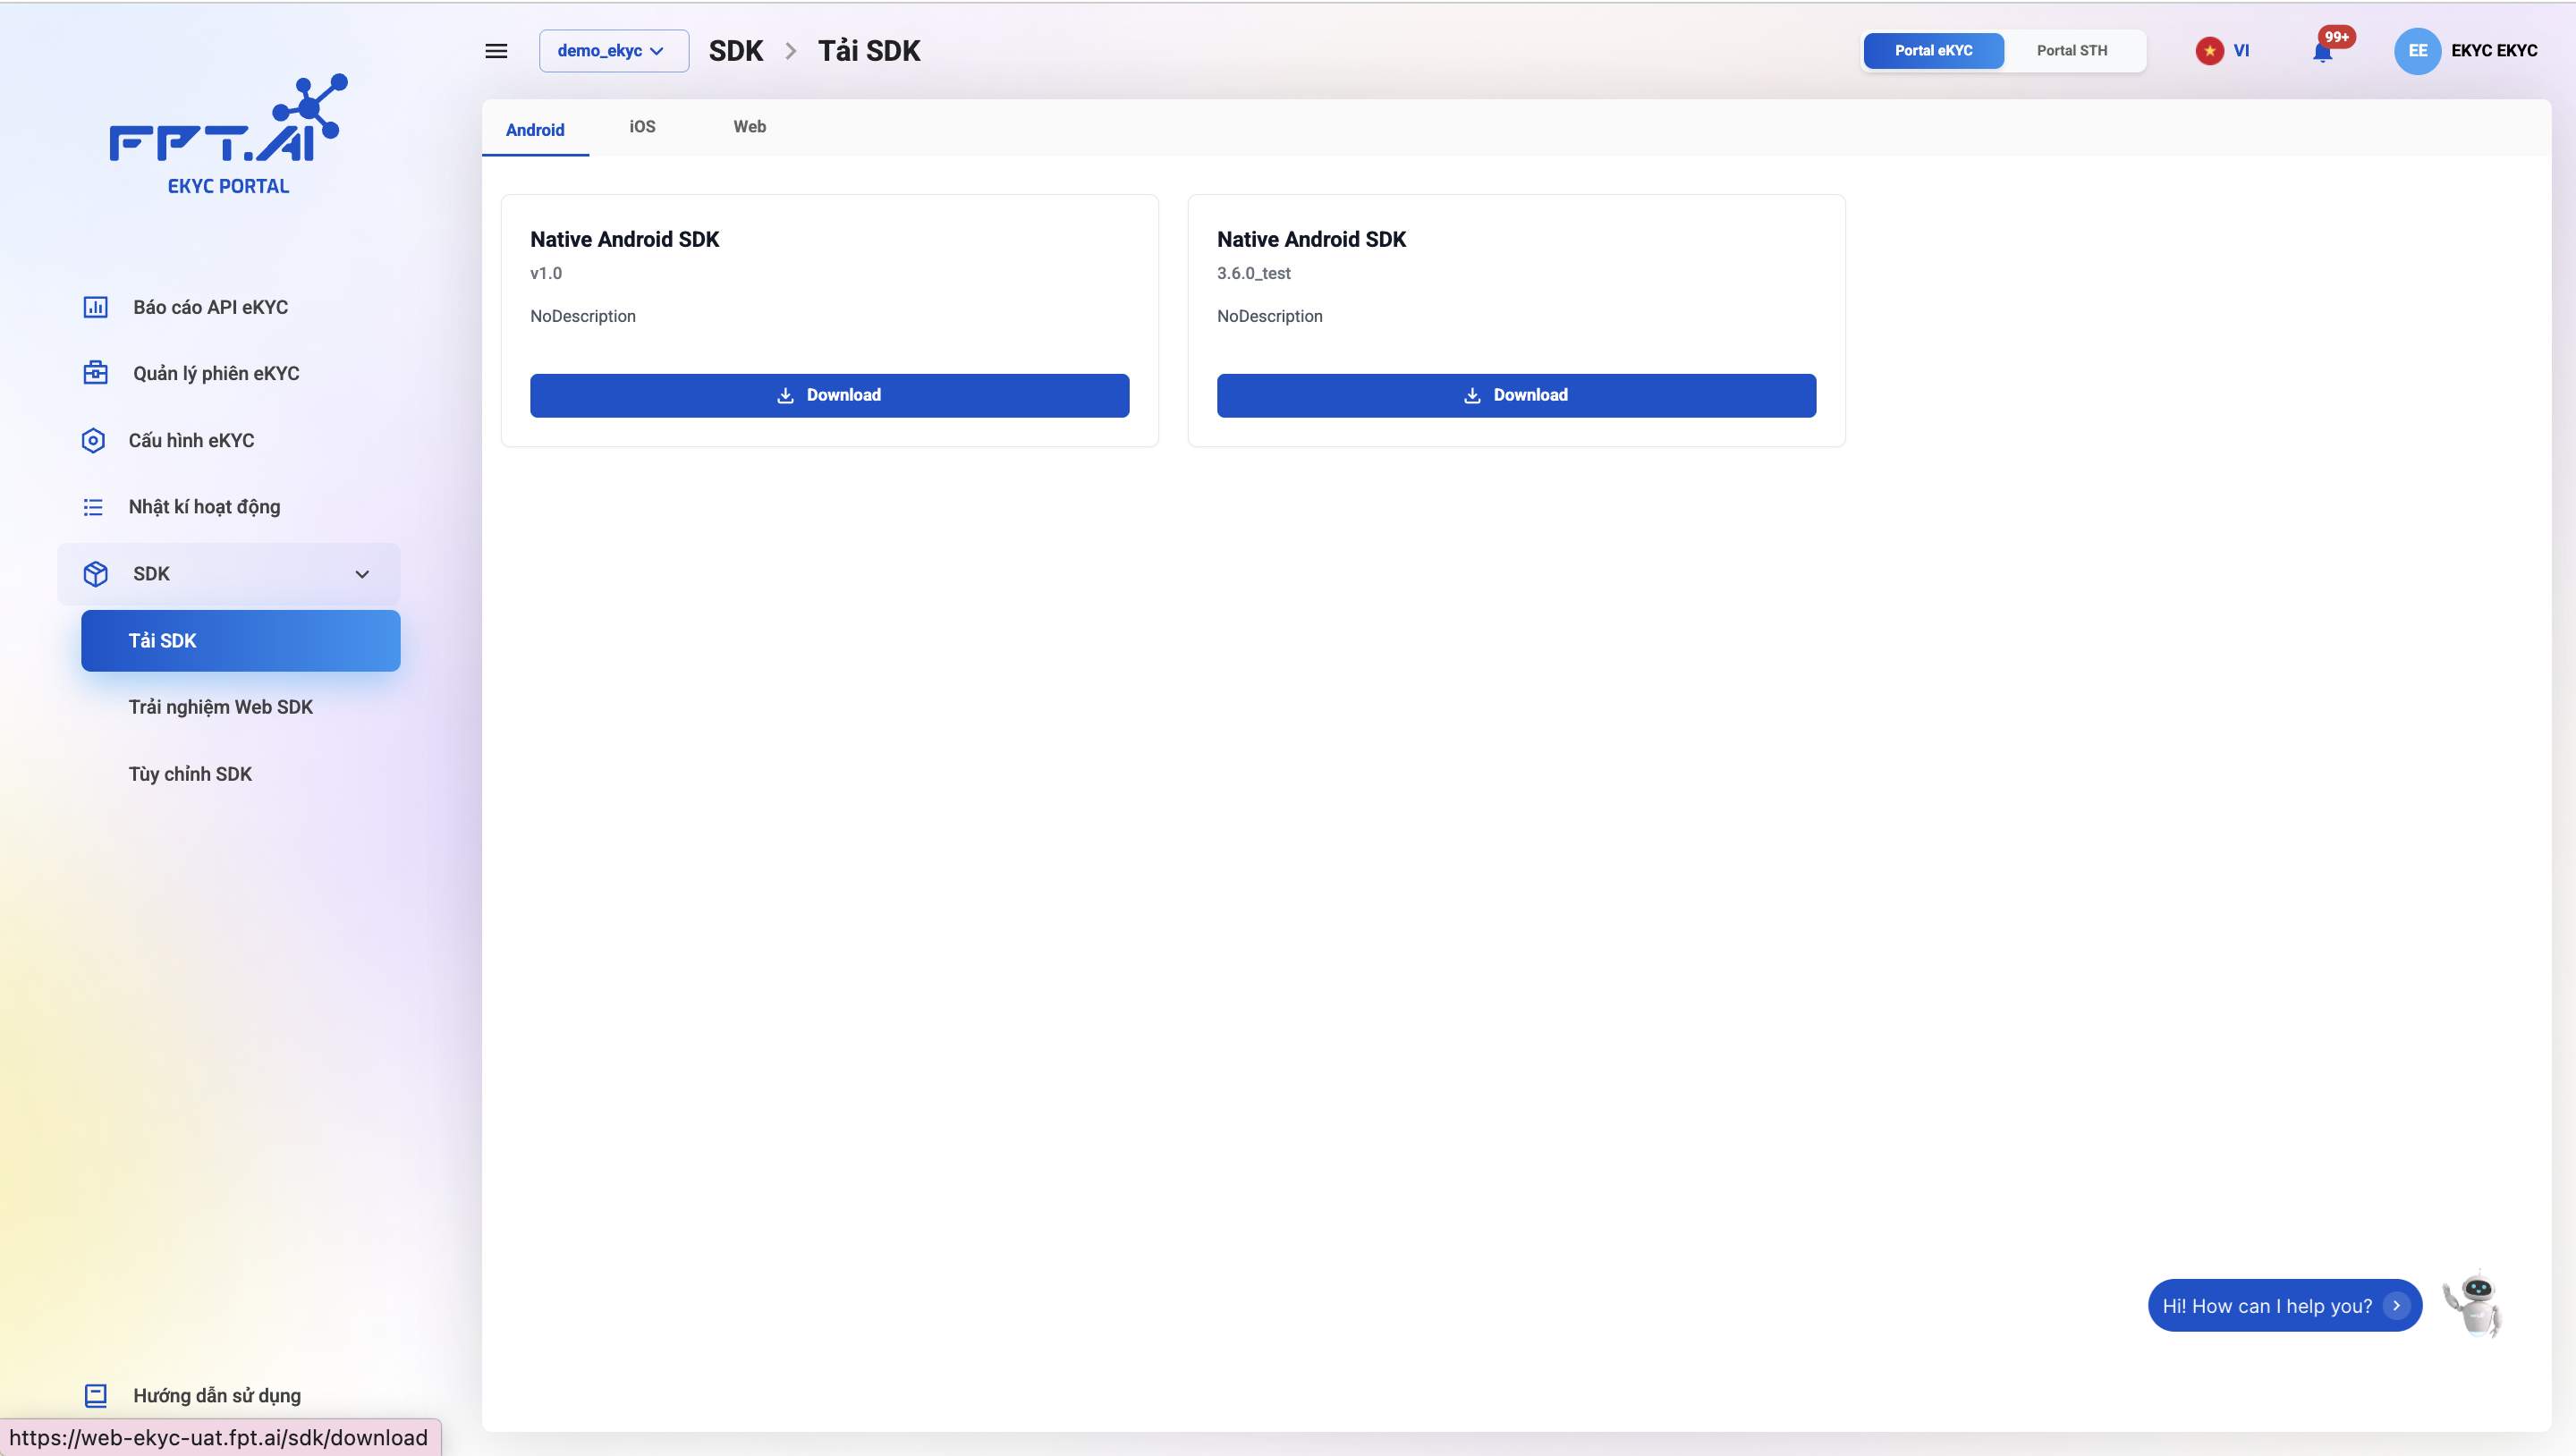
Allows downloading SDK packages for each platform.
Web SDK Demo Screen
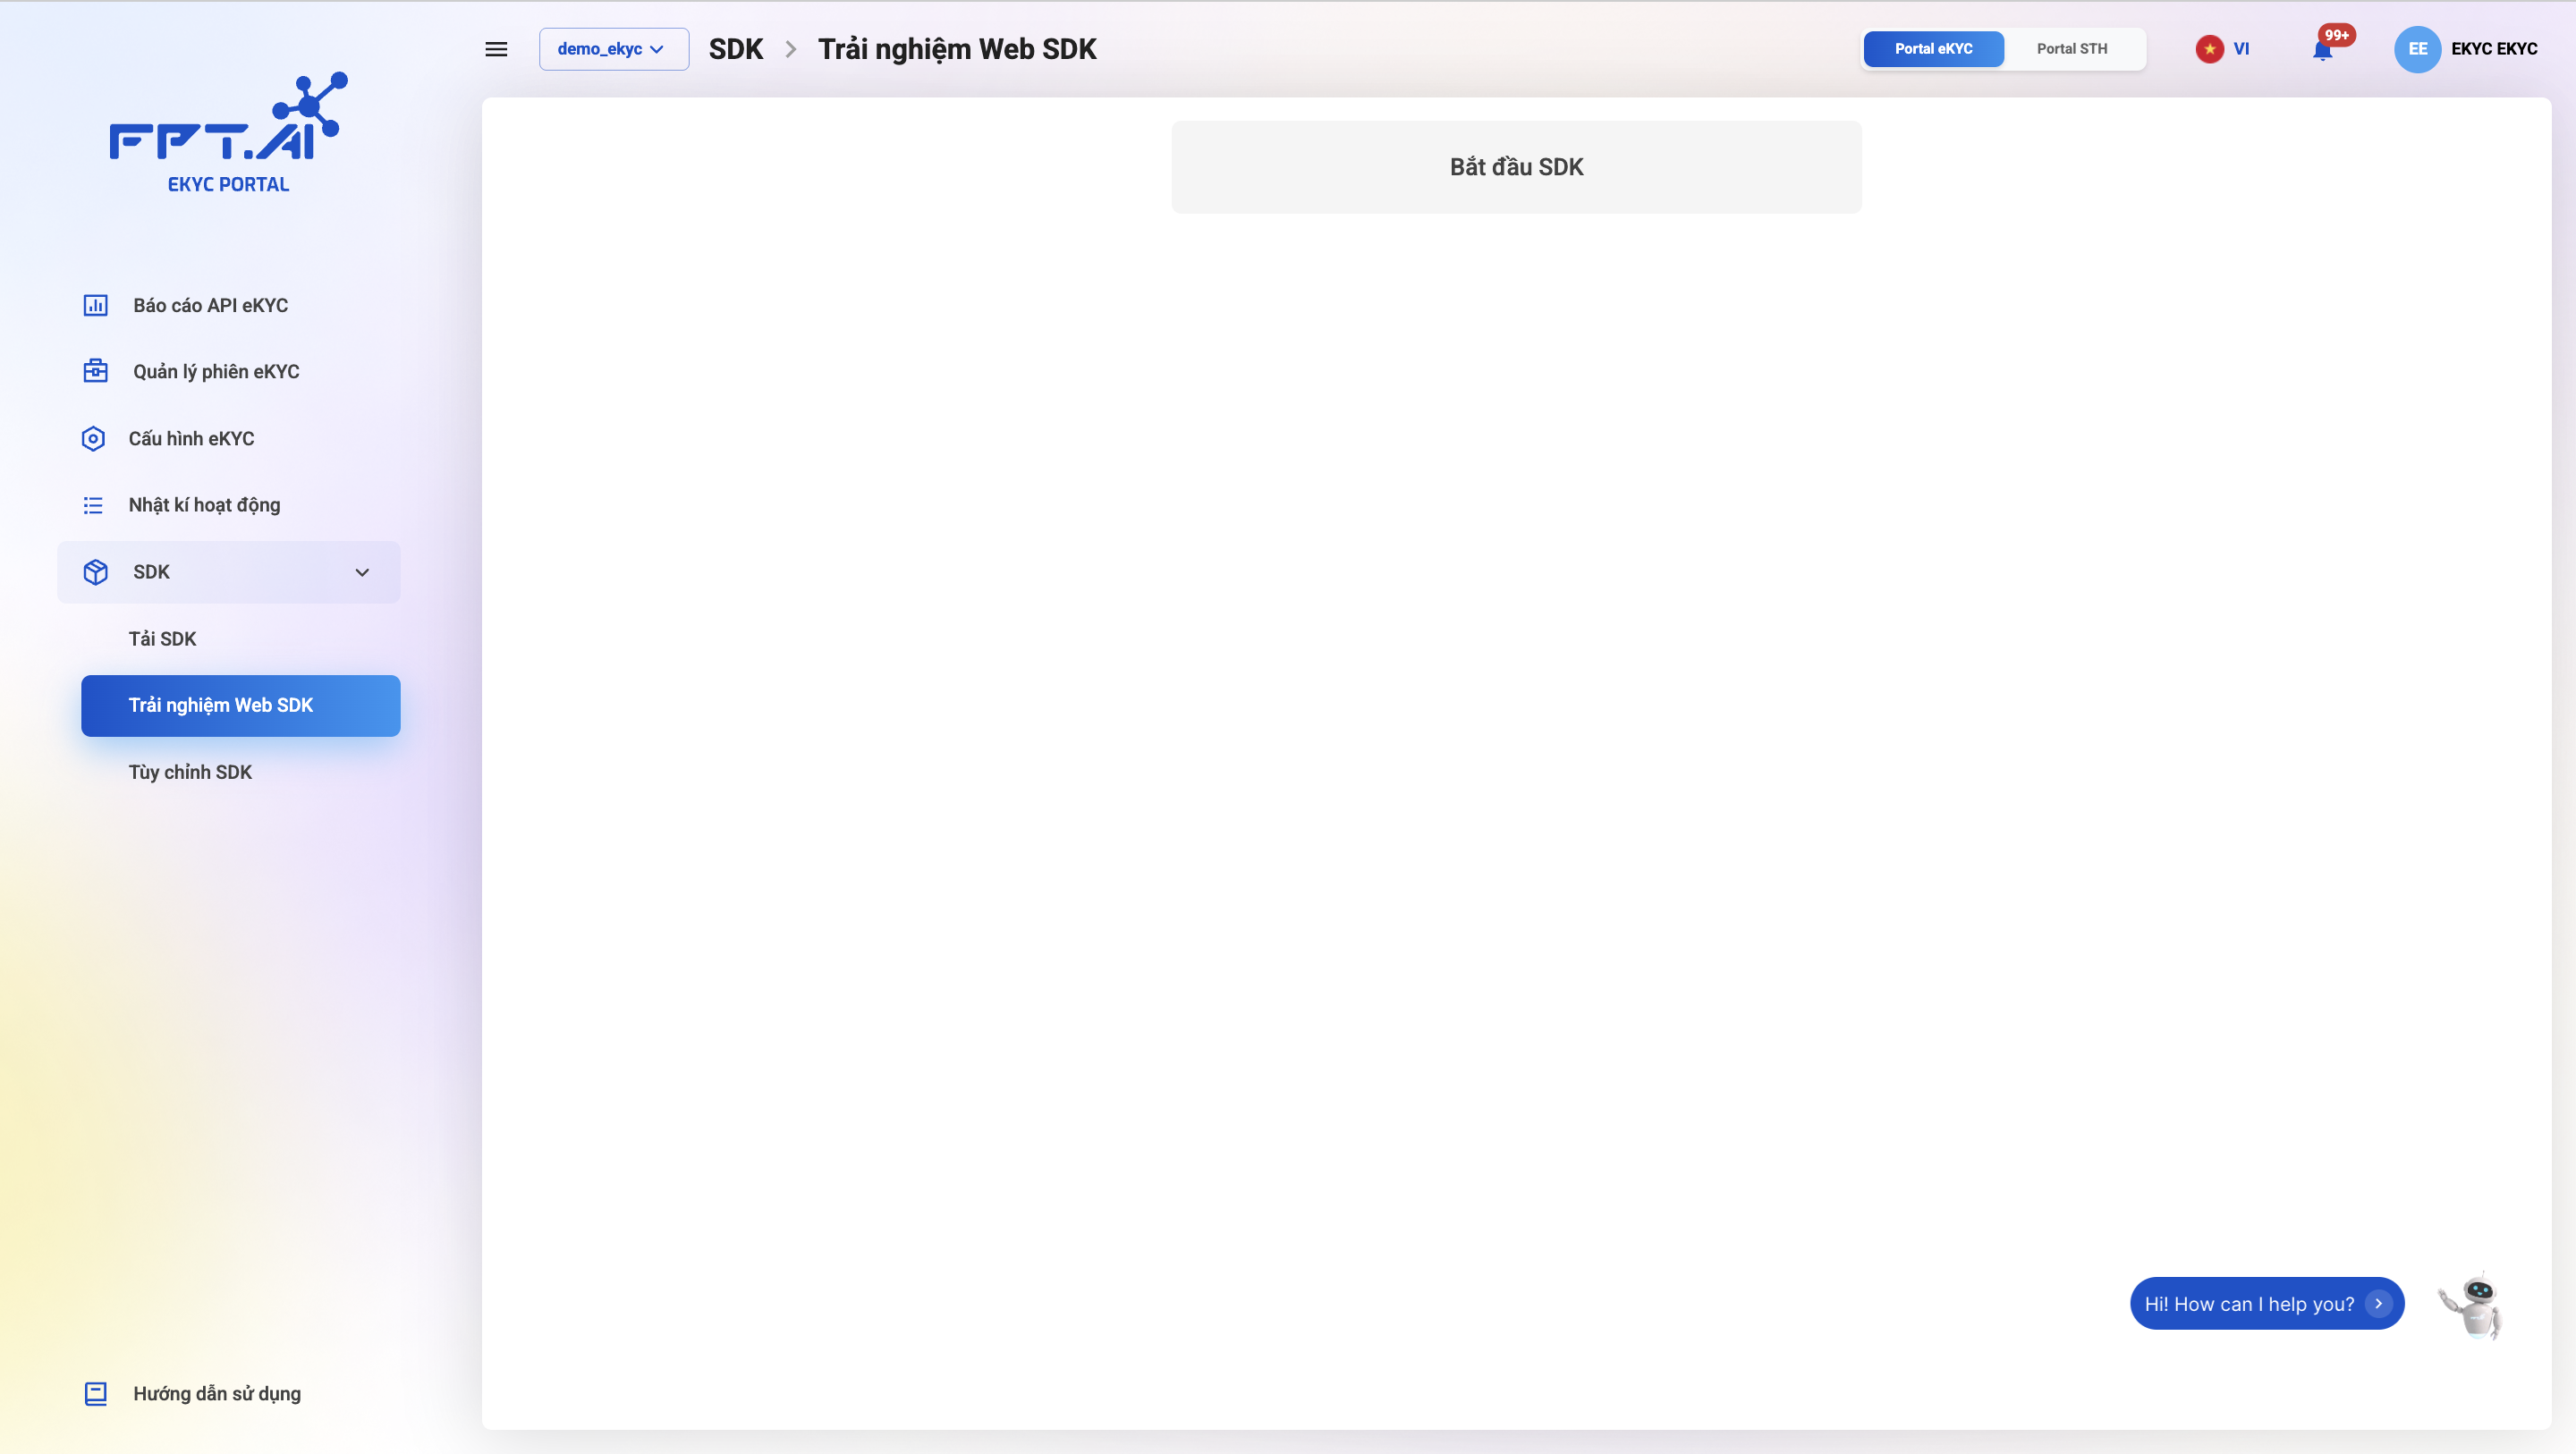
The Web SDK demo feature allows customers to try the Web SDK directly on the eKYC Portal without installation.
SDK Customization Screen
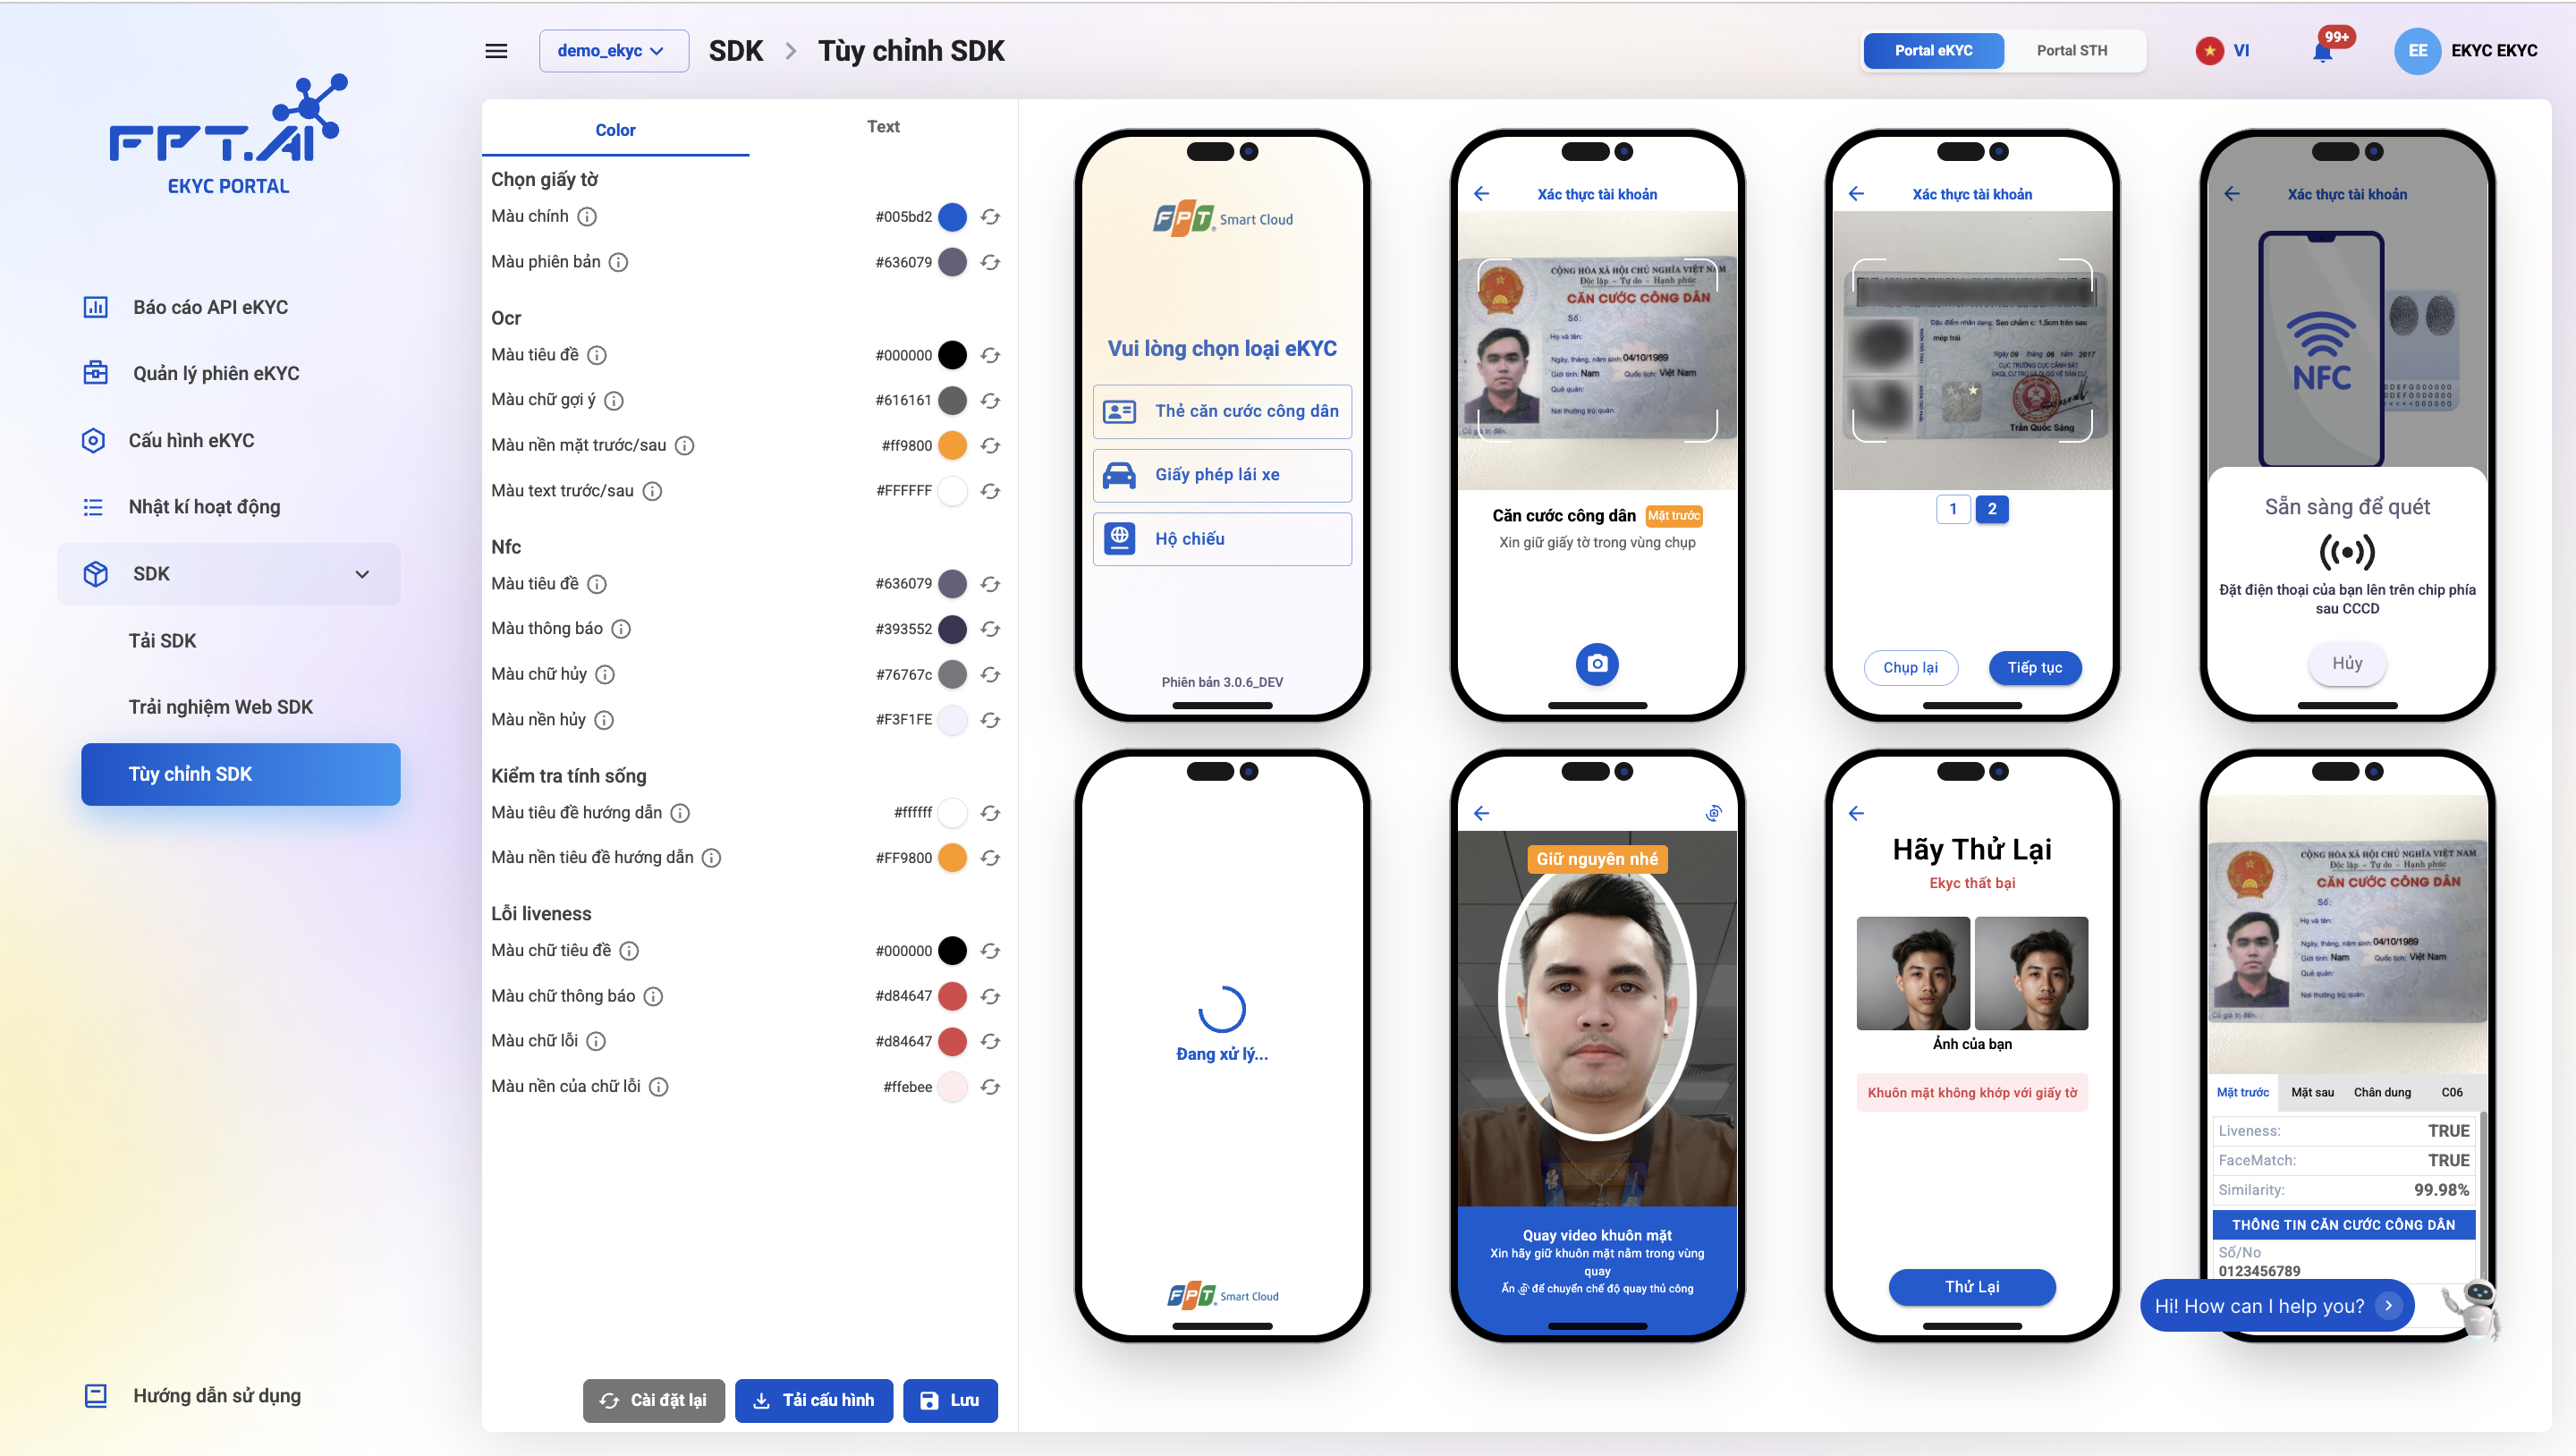
This feature allows quick customization of colors and some displayed messages on the SDK interface, with a real-time preview of the customization result on the right side of the screen.